Desiccated coconut stashdown 2011

Last week a momentous decision was made — it was time to run down my stash of desiccated coconut. My stash of desiccated coconut was first mentioned over a year ago, and despite my best efforts, it’s probably increased since then. Last week I made Coconut Pullapart Rolls from Not Quite Nigella. They turned out really well, and next time I’ll add some lime zest to the coconut filling.

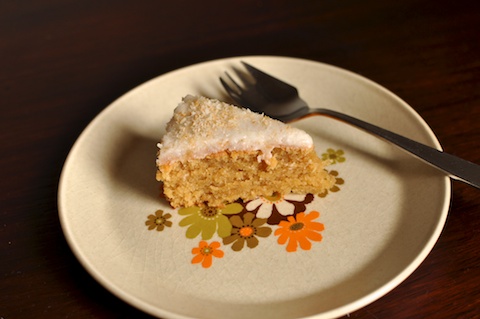
Today I consulted my Women’s Weekly recipe cards and came up with this delightful cake.

Toasted Coconut Cake

Cake

0.5 cups desiccated coconut
125 grams butter
1 cup of brown sugar, lightly packed
1 tablespoon golden syrup
2 eggs
a pinch of salt
0.5 teaspoon vanilla
1.5 cups self-raising flour, sifted
0.5 cup milk

Icing

1 cup icing sugar
1.5 tablespoons lemon juice
2 tablespoons desiccated coconut, extra

Preheat oven to 180 degrees celsius, and grease and line a 20cm round cake tin

Toast all the coconut in a frypan over low heat, being careful not to burn. Set aside two tablespoons for the icing.
Cream butter and sugar together until light and fluffy. Beat in golden syrup.
Add in eggs one at a time, beating the first in thoroughly before adding the second.
Mix in the coconut, vanilla and salt. Add in the sifted flour gradually, alternating with the milk. Mix well.

Bake for 35-40 minutes. When cool, ice with lemon icing, sprinkling the rest of the toasted coconut on top.

For the icing, simply sift the icing sugar and add the lemon juice. Mix until it’s at a soft spreading consistency.

This cake is fantastic. The toasted coconut reminds me of the marshmallows from Darrel Lea, and the combination of brown sugar and golden syrup gives it a faintly caramel flavour. Although I followed the recipe this time round, it would work just as well (or better) with the fluffy lemon icing used on the ginger cake I made last year. It’s a pretty moist cake which surprised me. I imagined that the crumb would be drier, but the all-knowing toothpick came out clean so it was done based on that test. That said, it wouldn’t have hurt to bake it a little longer.

Now my desiccated coconut stash is much much lower than a fortnight ago, and hopefully I’ll be able to keep it at manageable levels. I really dislike wasting food, and unfortunately it’s really easy to do in my pantry with it’s deep shelves. Previously I have tried to keep track of my pantry contents via a spreadsheet, but there must be a better way. Does anyone have any recommendations for pantry inventory apps for Mac? If not, I may need to have a word with Matt…
Precious

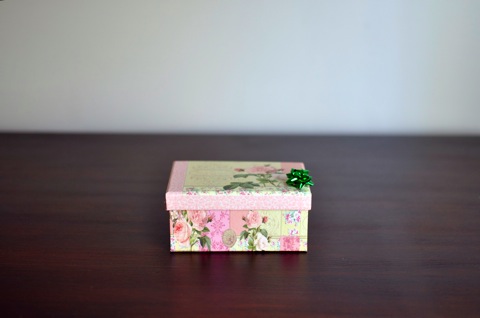
Christmas Day is now just a blip of a memory, but my Christmas was recently extended by the receipt of more presents (spoilt child that I am). One of those presents was very very precious, and I was, and still am, very lucky to receive it. My Mumma, the person who taught me to knit, gave me her button collection.

button box

For many crafty types, a grandmother’s button collection is a source of much joy and wonderment. This was no exception. Not only did I get a lot of lovely old buttons, but in some cases, she put sets of them in little bags and included stories of where the buttons came from.

panto buttons

‘These gold coloured buttons came from Aunt Nan in England. They were on a black silk jacket she had for a panto for the old ones. She was 88 then (lived to 99). Sent to be used for fancy dress, [my dad] had it on his Greek Evzone jacket. Won first prize.’

nana buttons

‘This is an old collection of my Mum (Granny), Nanna and some I collected over the years. I remember sitting on the mat in front of the fireplace at No.12 [her childhood home] and playing for hours with the button tin.’

I am very much my Mumma’s granddaughter in that we both knit, love op shopping and owls (my Mumma was all over ‘put a bird on it’ way before Portlandia). In our own ways we each love the past; I’m a sucker for nostalgia and she’s a mad keen genealogist. I haven’t really shown that much interest in my family’s history, but this button collection has completely knocked me over. Owning buttons from relatives that I know (Mumma), knew (Granny) and never met (Aunt Nan and Nanna) is really indescribable. They will be treasured.

The sum of parts

In the last week I’ve politely asked the pattern reading fairy to leave, downloaded more podcasts and got on with the job of knitting and finishing. Thanks to DrK for alerting me to the fairy’s existence (made it much easier to get rid of her once I knew she existed!) and everyone’s podcast suggestions.

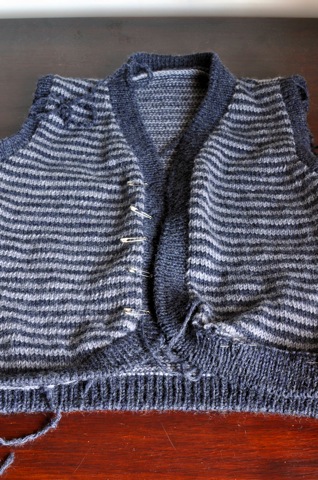
The sudden burst of motivation has resulted in the near completion of My Golden Hands vest. It’s probably really silly to feel like this, but I find this part of a knitting project really exciting. No longer does it look like a pile of related pieces, but an actual garment. Even seeing the parts come together neatly with mattress stitch is still slightly magical. Small things…

vest nearly done

It turns out that adding light grey stripes was a really good idea. I’ve had to unravel my swatch of dark grey Rustic for seaming, which means that I had pretty much just the right amount of dark grey for the vest.

The most difficult, or more accurately, annoying, part of the vest so far has been attaching the button band to the front pieces. Because it’s so long, I put it off as I thought it would be a tedious job. As is often the case though, once I started and got into a rhythm, it wasn’t too bad. At the moment it’s looking pretty good, bar slight lumpiness around the curved fronts. Let us hope a good wet block will sort that out.

When knitting attacks

For a long time, podcasts and I didn’t get along. Concentrating for long periods of time does not come easily to me, so I felt podcasts were out of the question. I mentioned this to a couple of knitting friends late last year, and I’m sure they found it all a bit odd. Then Matt started listening to Radiolab. He played a couple of interesting episodes to me, so I thought I’d try them again.

The last time I looked for knitting podcasts, there were only one or two about. My, how things have changed! The number of podcasts about knitting now borders on overwhelming. Based on tidbits I’d heard when my friends discussed podcasts, I started listening to the Knitmore Girls. So far I’ve only listened to a couple of their podcasts, but I’ve found them all quite enjoyable. The mother/daughter presenters have a really good rapport, and their conversational style makes for easy listening. In writing all this, I’m sure I’m probably the last person to discover the Knitmore Girls and that this is old news to knitters everywhere.

The title of this post is a blatant ripoff of the Knitmore Girls’ segments, where they discuss issues they’ve had with their knitting. To be fair, in my case ‘when duffers attack’ is probably a more accurate title as the knitting is not at fault at all.

Soon after my last post, I ripped out my first attempt at Lyttelton and decided that it was probably too big anyway. ‘This is my silver lining’ I thought, and cast on again with one less pattern repeat. By the time I got to the sleeves yesterday morning, it was clear something was amiss again.

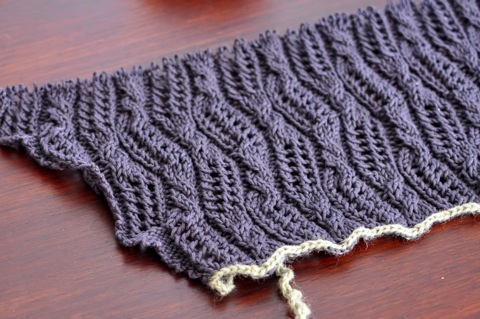
Comparing the shrug to the swatch, it appears I’m not starting each pattern repeat correctly. This means that the cable and trellis stitch was moving diagonally with each repeat, rather than straight up. Even though it was a fairly silly, simple mistake, it was subtle enough that it took me a little while to work out what I’d done wrong. It was also subtle enough that I can’t really capture it clearly on my camera. So yet again I shall frog, and hope that the mantra of ‘third time lucky’ holds.

punishment

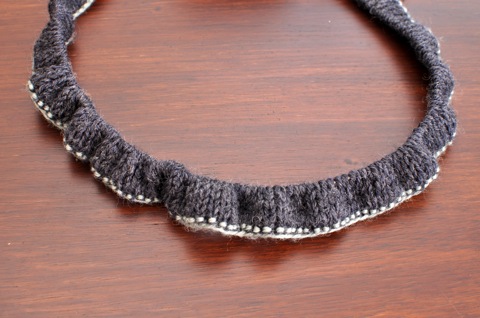
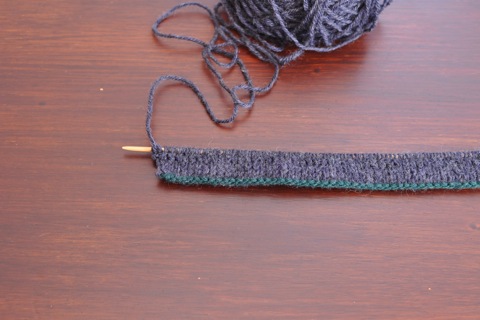
As punishment, I’ll hold off from casting on again until I’ve finished the bands for my stripy vest. It’s a fairly trivial task (famous last words!), but each row is 433 stitches. Of 1×1 rib. I like to think of it as the knitting equivalent of writing out lines. That’ll teach me… hopefully.

The quest for a silver lining

It’s been very humid here over the past week. Miserable weather is generally associated with the cold, but for me, this is properly miserable. Sticky, energy-sapping and generally uncomfortable.

Because the weather is so, I haven’t been knitting very much. However, I did decide that it was far too hot to be working on my two wool projects, so I cast on Lyttelton in grey (did you expect anything else?) Rowan Cotton Glace.

DSC_0718.jpg

The rows are a lot more time consuming than my usual stocking stitch, but the lovely trellis stitch makes it all worth it. Having said all that, I’m just about the rip out the whole lot as I don’t like how I’ve incorporated the pattern into the increases. It seems a shame to rip out all that work but it’s much better to start again than persist with something you’re unhappy with.

DSC_0723.jpg

While contemplating ripping out Lyttelton I reverted back to knitting with wool and started on the armbands for my stripy vest. All was going well there until discovering that I’d lost one of my knitting needles between the house and the train station yesterday morning. Chalk that up as one more reason to buy circular needles, something that I will do after writing this post. I’m also a bit concerned that there might not be enough yarn for the bands at the front, so I’ll think happy thoughts again, given how effective it was for Matt’s Dashing Jumper.

The mildly grumbly tone of this post is completely unwarranted given the terrible flooding in Queensland (and since I originally wrote this, New South Wales, Victoria and Tasmania on a smaller scale, and also Brazil and Sri Lanka). It’s terribly disarming watching the news and reading the paper, knowing I cannot help with sandbagging or cleaning or fostering animals… or just not be completely useless besides donating money. Having a few problems with my knitting projects pales in comparison.

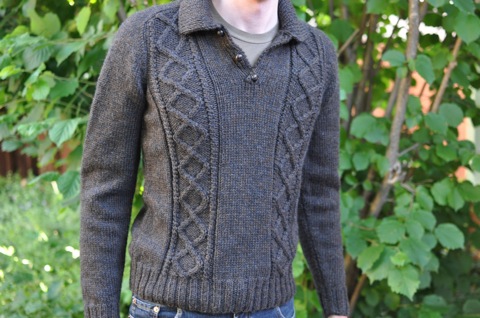
Matt’s Dashing Jumper

Thank you everyone for your kind words and new year wishes. I hope the start of the year has been nice and relaxing (or completely frantic, depending on your preferences).

It seems difficult to start with the new year with the past still lingering in the background. As mentioned in the previous post, I’m really pleased with 2010’s last finished knitting project.

Dashing jumper

Shirt from Patons book 929, Quiet Days in Jet and Skol
5.5 skeins of Cascade Yarns 220 Heathers, Bainbridge
3.75mm and 5.00mm needles
Start: September 2010
Finish: December 2010
Modifications: Shorter body, lengthened sleeves
Ravelryed: here

This is the second jumper I’ve made for Matt and I think it was a much greater success than the first one. Most importantly, this is the first attempt at knitting it, as opposed to the one and a halfth or second or whatever version I got to on the suave sweater. It’s also a bit more fitted than the first one so I think it’ll get a bit more wear. All in all, another win for Patons knitting patterns from the 70s!

Like most of my knits these days, it was largely stocking stitch, but I don’t remember getting bored at all. In fact, I’d go as far as to say that I’m in slight mourning that I don’t have to work on it anymore. That’s not to say I’ll be unravelling it and starting again though…

Cascade 220 was great to knit with. The yardage/meterage was fantastic and the colour matched the pattern well. Initially I had concerns the twists would disappear in the slightly flecky yarn, but I think it looks fine. Most importantly, 6 skeins was exactly the right amount. There’s probably enough left over for a hat, but not much more.

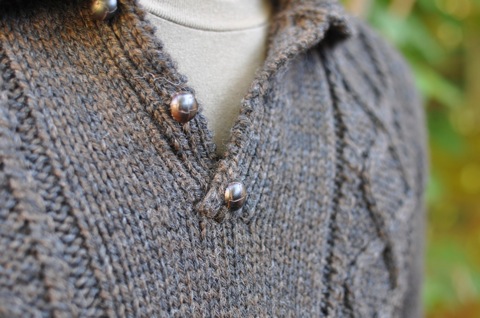
buttons

The buttons, as usual, are from Buttonmania.

Normally the end of a project signals the beginning of another. In this case, finishing Matt’s jumper brought me back to two works in progress which is my usual number. I’d love to start something new, and have already chosen my next project, but really must finish something off first!

Round up 2010

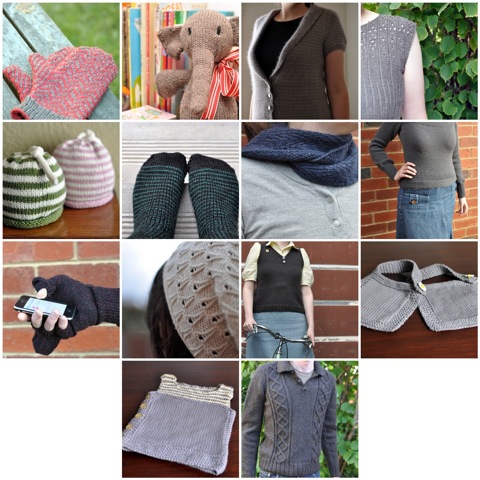
In thinking about this post, I was chiding myself about my lack of productivity. Only fourteen finished objects, for shame! Then I thought about it a bit — this year I went overseas, provided Matt with the tiniest little bit of help in releasing his first Mac app, restored some outdoor furniture, completed a graphic design short course (which included doing some cross stitch for the first time in a long long time) *and* finished fourteen knitting projects. So now I understand why, in the twilight of 2010, I’m feeling quite tired.

mosaic 2010

It seems the knitting theme for this year was dark and grey. For many years I was very much a brown and green lass, but these days it’s all about the grey. Looking at my Ravelry queue, next year may be fairly grey too. Just for variety’s sake, I’ll try to provide the odd flash of colour where I can.

A lot of these knits have been used or worn a lot. Matt’s gloves, my herringbone mitts and Still got a good work out during the depths of winter. My grandfatherly vest has been fantastic in this indecisive weather, and Bottom’s Up, despite my concerns about it being too short, is starting to get quite a good run. This encapsulates knitting as a hobby for me; as enjoyable as I find creating objects using sticks and string, it’s knowing that my projects will be used and loved that provides the greatest satisfaction.

It probably a bit funny to follow that profound statement with the declaration of my favourite project of the year, particularly because it’s as-yet unworn and unblogged. Without stealing too much material for my next blog post, I’m thrilled to bits with how Matt’s dashing jumper turned out.

Fare thee well 2010. Let’s hope 2011 will be just as productive, and a little less tiring. Thank you everyone for your comments, emails and readership, I really appreciate the time everyone takes to read my funny little blog.

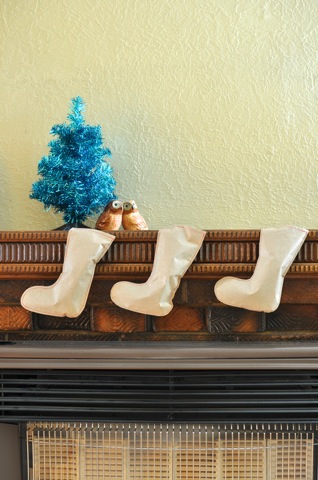
Little paper stockings

For a good part of yesterday afternoon, Matt and I worked on putting these little beauties together. As many of my non-knitting projects do, this started off as a childhood memory. When I was younger, I really liked receiving those clear plastic stockings filled with popular chocolate bars for Christmas. They’re admittedly cheap, overpriced tat, but there’s no accounting for taste when you’re younger (my love of New Kids on the Block is another example of my dubious taste as a child). From that little seed of a memory, I made my own version of them.

paper stockings

Because they’re pretty quick to put together, and thus could work as a last minute gift, I thought I’d note down how we went about making them.

Ingredients:
Stocking template
Paper
Pencil
Eraser
Sewing thread
Scissors

Wrapped sweets

Method:

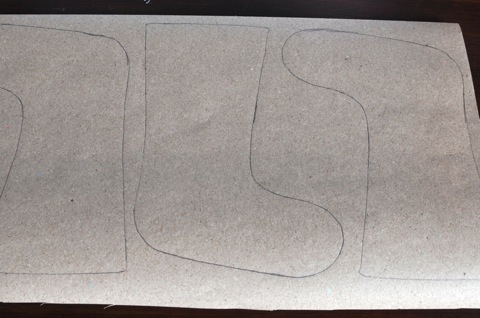
I’m not good at drawing, so I found a stocking template on Google Images to trace around. My stockings ended up being around 18cm long, 8.5cm wide at the top and the foot 12.5cm long. However, rather than be prescriptive about it all, I recommend finding a template that appeals and go with that. Or, if you are that way inclined, draw a stocking shape freehand.

traced out stockings

We then traced the stocking shape onto a double layer of paper. We used brown paper from a large stationery chain store and could fit three stockings across the width of the paper. The most important thing about selecting paper to use in this project is to choose something that is strong enough to hold the weight of the sweets and treats you wish to put in them, but not so stiff that it can’t be closed up at the top.

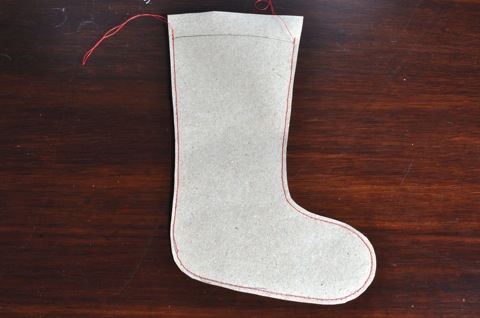
At this point it’s probably best to cut around the stockings, leaving a 0.5-1cm seam allowance, but as my sewing skills are about as good as my drawing skills, I sewed around the stockings first using my sewing machine then cut them out. In some ways this was a good exercise in sewing machine control for me… in fact, it’s possibly something I should have done before launching into sewing garments. Oh well, you live, you learn.

sewn stockings

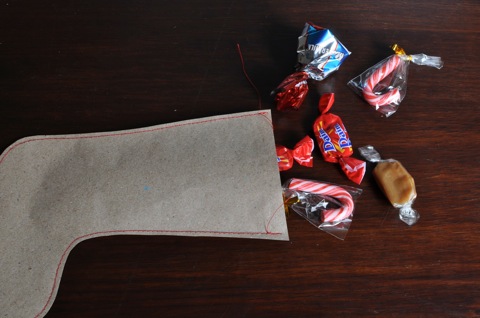
Then we erased any visible pencil marks, and filled with a delightful assortment of wrapped lollies. I found it a bit difficult to get lollies into the toe of the stocking. This slight issue could easily be alleviated by making a bigger stocking, or using a template where the foot is not at a right angle to the leg.

stocking with lollies

Once the stocking is filled with treats, sew up the top, trim any excess thread and any excess paper at the top, and you’re done!

‘Tis a really simple project; in fact, I’m wondering whether I really needed to write out directions. Unnecessary though they may be, they do provide a good segue way into wishing you all a very relaxing and enjoyable holiday period. Stay safe if you’re driving anywhere, and beware of snow drifts (this goes for people in the northern or southern hemisphere!).

Little details

It’s astounding how seemingly quick projects can be held up by little, but important, details. A fine example of this is a couple of small baby items I started nearly two months ago. The knitting portion of the projects was completed very quickly, but finding the right buttons was really difficult. I visited all my usual haunts (and lamented the shrinking collection of buttons at the Elizabeth Street Clegs), but couldn’t find anything suitable. Finally the right buttons were found and the projects finished.

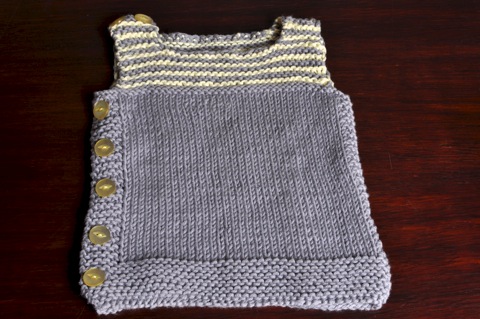
Pebble

Pebble by Nikol Lohr
1 ball Freedom Sincere DK, grey; a skerrick of Freedom Sincere DK, yellow
4mm needles
Start: November 2010
Finish: December 2010
Modifications: slightly larger needle, small row- and stitch-count changes accounting for gauge, striped garter stitch section
Ravelryed: here

Now that it’s all done and photographed, I’m a little disappointed with how this version of Pebble turned out. Pretty much all of this is down to two decisions I made when first starting Pebble.

The first problem is the yarn choice. As my friend’s baby was due in November, I thought using a cotton yarn would be more practical as we’d ordinarily be heading into warmer weather. So far, this summer can only be described as tepid, so a wool-based yarn might have been ok. It’s been quite some time since I’ve worked with cotton, and had forgotten how unforgiving it is relative to wool. So, the fabric’s probably a bit more uneven than I’d like, and some of the weaving in of ends shows through a little bit on the front.

The second problem is my dogged insistence to have a striped yoke (if it indeed can be called a yoke). Initially I wanted to make the garter stitch section blue, yellow and grey. As it wasn’t possible to hide the edge where I carried the yarns, it looked really messy and was quite bulky. By this stage my friend’s little girl was born so the blue was ditched and the garter stitch section consisted of grey and yellow stripes. Even with one less colour and strand of yarn it still looks a bit messy and bulky.

Despite my mild disappointment with the end result, I think, and hope, it’s still wearable.

ends

One thing I should mention about the pattern is the number of ends it produces. This wasn’t helped by using two colours in the top section, but it still seemed like quite a large number for such a small garment. The photo above shows how many ends were woven in… So don’t be fooled by the fact it requires no seaming. You will be paying for that privilege in the form of weaving in ends.

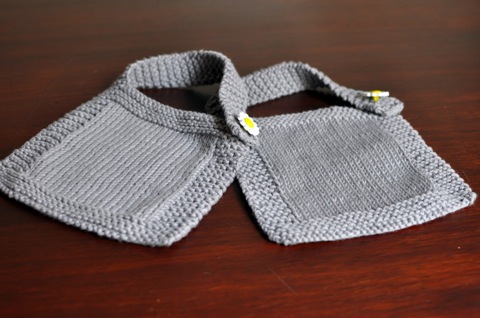
Happily, the other quick project for my friend’s baby girl turned out quite well. As it happens, there’s a free bib pattern out that roughly matches the pebble vest.

Bibs

Easy Peasy Baby Bib by Michelle Acuavera
Scraps Freedom Sincere DK, grey
4mm needles
Start: November 2010
Finish: December 2010
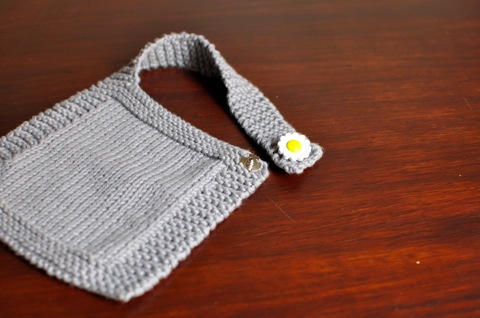
Modifications: smaller needle, small row- and stitch-count changes accounting for gauge, striped garter stitch section, press stud closure
Ravelryed: here

press stud

These were very quick to make and a good use of leftover grey yarn. Small modifications were made to the number of stitches cast on and rows worked because I used 8ply instead of the recommended worsted weight. After a small amount of market research, I opted to use a press stud as the closure rather than a button hole. According to a friend with an almost 2 year old, a buttonhole closure might prove a bit fiddly. It looked a bit plain with the hidden press stud, so a button was added for purely decorative purposes. I did toy with making some bibs using the yellow cotton, but decided pretty quickly that it wasn’t nearly as practical a colour as the grey.

It was quite a relief to get something, no matter how small, finished. It felt like quite a while since I’d triumphantly snipped off the last woven in end of a project!

The stripes have it

vest plus stripes

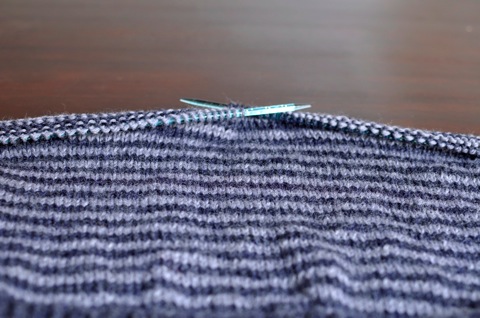
Thanks everyone for your opinions on how to proceed with the vest. As you can see, the stripes won.

Despite my rash claims that there was nowhere near enough yarn, there may have been *just* enough to make the vest in one colour. However, I’m not much of a risk taker and having non-matching sections from different dyelots simply wouldn’t do. The gentle prodding in the comments and the fact the two greys look good together may have also played a part in the final decision…

Initially I was a little concerned that the two-row stripes were a bit wide, particularly because I envisioned stripes a la Treeline Cardigan. As I’ve knit more and more, the stripes seem fine as they are. Who knows, with my current enthusiasm, this may end up being my last finished object for the year!