Archive for the ‘Tutorial’ Category

Little paper stockings

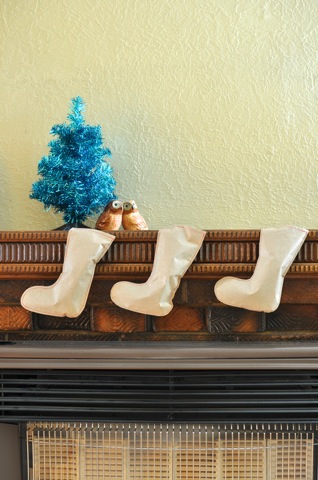
For a good part of yesterday afternoon, Matt and I worked on putting these little beauties together. As many of my non-knitting projects do, this started off as a childhood memory. When I was younger, I really liked receiving those clear plastic stockings filled with popular chocolate bars for Christmas. They’re admittedly cheap, overpriced tat, but there’s no accounting for taste when you’re younger (my love of New Kids on the Block is another example of my dubious taste as a child). From that little seed of a memory, I made my own version of them.

paper stockings

Because they’re pretty quick to put together, and thus could work as a last minute gift, I thought I’d note down how we went about making them.

Ingredients:
Stocking template
Paper
Pencil
Eraser
Sewing thread
Scissors

Wrapped sweets

Method:

I’m not good at drawing, so I found a stocking template on Google Images to trace around. My stockings ended up being around 18cm long, 8.5cm wide at the top and the foot 12.5cm long. However, rather than be prescriptive about it all, I recommend finding a template that appeals and go with that. Or, if you are that way inclined, draw a stocking shape freehand.

traced out stockings

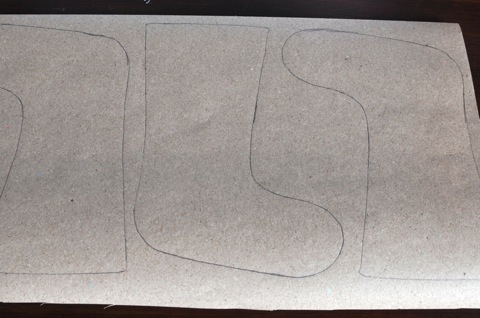
We then traced the stocking shape onto a double layer of paper. We used brown paper from a large stationery chain store and could fit three stockings across the width of the paper. The most important thing about selecting paper to use in this project is to choose something that is strong enough to hold the weight of the sweets and treats you wish to put in them, but not so stiff that it can’t be closed up at the top.

At this point it’s probably best to cut around the stockings, leaving a 0.5-1cm seam allowance, but as my sewing skills are about as good as my drawing skills, I sewed around the stockings first using my sewing machine then cut them out. In some ways this was a good exercise in sewing machine control for me… in fact, it’s possibly something I should have done before launching into sewing garments. Oh well, you live, you learn.

sewn stockings

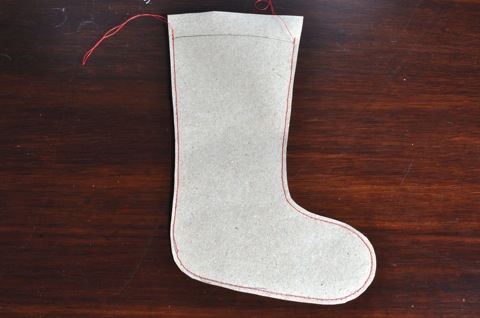
Then we erased any visible pencil marks, and filled with a delightful assortment of wrapped lollies. I found it a bit difficult to get lollies into the toe of the stocking. This slight issue could easily be alleviated by making a bigger stocking, or using a template where the foot is not at a right angle to the leg.

stocking with lollies

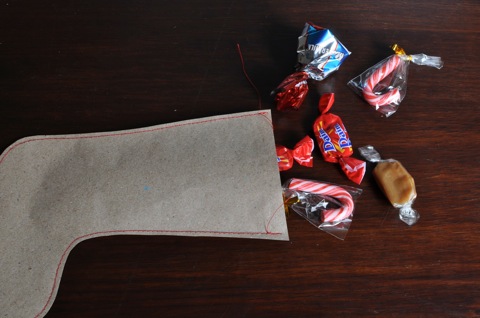
Once the stocking is filled with treats, sew up the top, trim any excess thread and any excess paper at the top, and you’re done!

‘Tis a really simple project; in fact, I’m wondering whether I really needed to write out directions. Unnecessary though they may be, they do provide a good segue way into wishing you all a very relaxing and enjoyable holiday period. Stay safe if you’re driving anywhere, and beware of snow drifts (this goes for people in the northern or southern hemisphere!).

Uncropped, untryst vest: a tutorial

Since finishing my green vest a little while ago, I’ve had a couple of questions about how I lengthened the vest (the original pattern is for a cropped vest). With the permission of the designer, Kristen TenDyke, I thought I’d put up some notes about how I went about it. This is my first proper attempt at explaining alterations to a pattern, so please forgive me if it goes into too much detail, or not enough.

Some caveats before I start: the modifications worked well with the yarn I used, the garment size and my body type. You may need to go about things a little differently in order to make it work for you. These notes are meant purely to give an idea of one way the vest can be lengthened to sit at the hip, rather than starting from the ribs. These suggestions should be read in conjunction with the original pattern, which can be found here.

All numbers used will be based on the medium size, which is the size I made. The numbers are there to give a concrete example of how the shaping works, rather than just trying to explain it in abstract terms.

DSC_0872.jpg

The shaping I used follows a basic hourglass form; the width decreases from the hip to the waist, and then increases from the waist to the armholes. In a nutshell, I did a mirror image of the waist to armhole shaping. Hopefully the photo above shows that shaping clearly enough.

Back

The number of stitches cast on is equal to the number of stitches just before the armhole decreases. So, in the case of the medium size, I cast on 80 stitches rather than 72. The border is worked as instructed in the pattern. The shaping is then worked as follows:

Starting from the first row after the border, I decreased both sides every 10 rows, 4 times. This left me with 72 stitches — the number you would cast on if making the original version. From here I knit 4 rows, then followed the pattern as written. The 4 rows in between the decreases and increases were added to ensure I got the right length for my body.

In some ways, the medium is a bad example because it has the most straightforward shaping. If I were making the small size, I would do the waist shaping as follows:

Starting from the first row after the border, decrease each side every 8 rows once, and then every 10 rows 3 times.

Essentially, you’re reversing the waist to armhole shaping in two ways; instead of increasing, you’re decreasing, and you’re reversing when the decreases are made (rather than every 10 rows x 3 and every 8 rows x 1, it’s every 8 rows x 1 and every 10 rows x 3). The reason I would do it this way is for symmetry. However, I don’t know if it would make that much of a difference.

Front Pieces

For the front you just need to cast on half the back stitches for each front piece. So for a medium, just cast on 40, rather than 80. Follow the same pattern with the decreases (but just for one side), remembering to cast off 5 after the border to account for the button band.

The length of the piece before decreasing for the neck can be calculated as follows:

length before neck shaping = length covered by the hip to waist decreases (do not include the border, but do include any extra rows before the waist to armhole increases) + the length specified in the original pattern.

For me, 14.5cm (5.75 inches) covered the decreases from hip to waist, plus the 4 rows of stockingette. Add that to the length of the piece specified in the pattern before starting the neck shaping (6.25 inches for medium), making the front pieces measure 30 cm (12 inches) before starting the neck shaping.

I followed the pattern after that point. All decreases (waist to arm hole, and neck) were worked as in the pattern.

Buttonband

I winged this bit the most out of all the modifications. I picked up the number of stitches around the neck as specified in the pattern. However, down the fronts, I picked up roughly one stitch for each row, ensuring the same number of stitches were picked up on both front pieces. As I roughly doubled the length of the vest, I put in 8 buttonholes. Because the pattern calls for rather bulky yarn, I recommend putting in more buttonholes rather than less. The bulk can result in pulling between the buttonholes which is a hard look to pull off. Having more buttonholes alleviates this issue.

I’m reluctant to give stitch numbers here, as it’s highly dependent on the length of the vest and how many stitches you pick up around the edges. Ultimately, just take the number of stitches picked up between along the fronts, divide it by the number of buttons you want and move the numbers around so the number of stitches between buttonholes are pretty much the same (e.g the number of stitches between buttonholes alternated between 7 and 8 stitches for me).

So, that’s all the alterations I made to the pattern to come up a vest that sits at the hip rather than the waist. I hope that it’s useful for anyone who’s thinking of making a longer version of the vest, and doesn’t add confusion. If any of my instructions are unclear, please let me know and I’ll try to explain it better.