Archive for the ‘Vest’ Category

Testing, testing…

This is possibly the most boring post you are ever likely to read. It’s also possibly a slightly disturbing insight into the workings of my mind. Don’t say you haven’t been warned!

Acquiring a new appliance or gadget always comes with a mildly obsessive testing phase in this household. Earlier this year we bought a new iron and for the first few weeks, I ironed shirts and trousers and skirts and handkerchiefs as soon as they were dry. Ironing clothes is a fairly common chore so this probably doesn’t seem that extraordinary. However, we have a policy of minimal ironing so it was quite a strange phenomenon for this household. The iron still gets used relatively often, but not with quite the same amount of joy or frequency as when it was in its testing phase.

Recently I determined that some of my knits were looking a bit fluffy and/or pilled and the de-pilling comb I was using wasn’t really suitable for hand knits. After a bit more research than was probably necessary, an electric fabric shaver was purchased. It’s probably a bit more than I was expecting to pay, but I read a lot of good things about it on Ravelry, which had to count for something, right?

Today it arrived, and before you could say ‘please stop writing about de-pilling knits Emma, it’s disturbing’, I had taken the vest I was wearing off and was removing woolly fluff like it was my last opportunity to do so, ever.

For those wanting relief from the ins and outs of my pilling solutions journey, my first victim was my Grandfather Vest. This vest really deserves its own ‘where are they now‘ post, because it’s probably one of my most frequently worn knits. My initial misgivings about the fabric appearing uneven were soon forgotten. In fact, the only real issue I’ve had with it is that it looks a bit fluffy and daggy with all the wear it has had. This is what it looked like before I took to it with the fabric shaver:

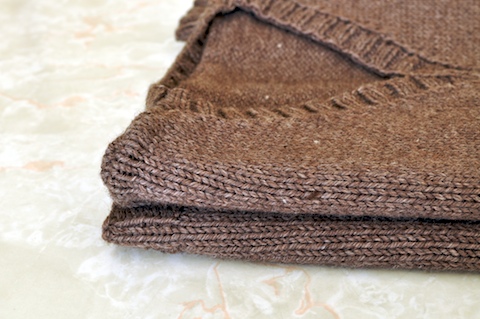
fluffy vest

And after:

unfluffy vest

The difference between the two photos probably isn’t that great, but I can assure you that it took off a *lot* of fluff. The vest probably doesn’t look completely brand new, but it’s looking a lot less daggy. Decidedly undaggy, even.

Now I’m assembling a mental list of all the items of clothing Matt and I have that need de-pilling. All in the name of testing.

The beginner’s vest

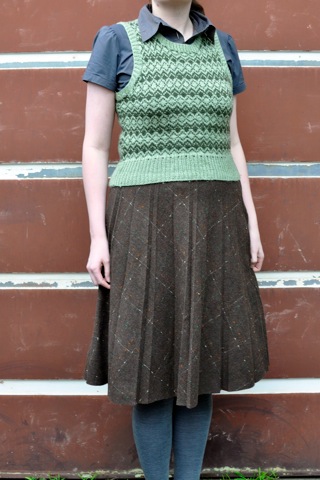
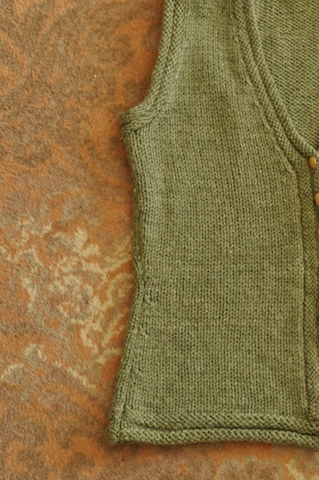
green vest

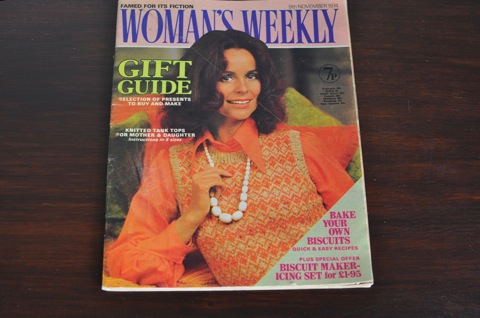
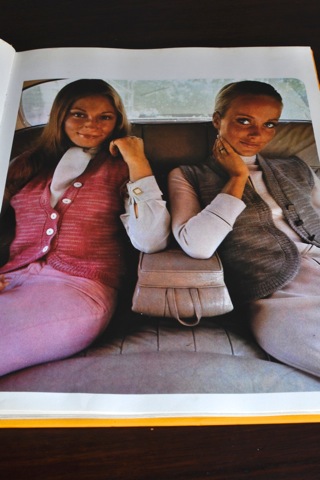
This is a vest made not long after I took up knitting again, and it’s one of my favourite knitting projects. When I started knitting again, I gravitated towards vintage and retro patterns. As it happened, I was a voracious op shopper at that time, and the op shops I frequented had a really good supply of patterns from the 40s-70s. The pattern for this vest was from the English Woman’s Weekly from 9 November 1974.

magazine

The colour combinations suggested in the magazine included grey and blue, amber and rust, oatmeal and sage and turquoise and grey. I was going through a green and brown phase at the time, so used a light green and olive green 5ply from the Bendigo Woollen Mills back room.

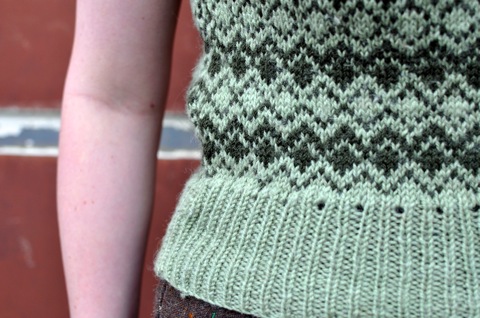
It was my first attempt at colourwork, and even now I’m pretty impressed with how it turned out. The knitting’s quite even and there’s pretty much no puckering. However, I never wear it because of a few rookie mistakes. The biggest problem is that it’s too short. This is probably because I used a 5ply instead of an 8ply yarn, and also suspect ‘gauge swatch’ was some manner of strange term I’d never come across. My increases are a bit… holey, even though I’m sure I knew how to do bar increases. So, while there’s not actually many mistakes, they’re pretty noticeable ones.

holey

All that said, I can’t bare to unravel it. Even though it just takes up precious wardrobe space, I still feel proud when I spy it under the piles of knitwear. I definitely want to knit the vest again, but with 8ply and after a gauge swatch. It’s also a project that makes me feel a bit sad. I think it was a fairly adventurous knit for a relative beginner, and it makes me wonder where that sense of adventure went; after all, it’s only yarn and patterns are merely serving suggestions…

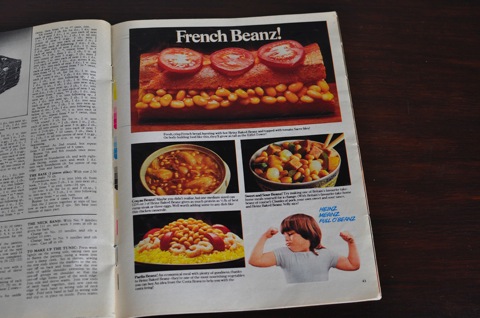
On the topic of serving suggestions and a sense of adventure, the magazine didn’t just have a snazzy vest pattern. Amongst other things, it also had a fantastic ad for a well loved foodstuff:

beanz

Anyone for paella beanz?

Golden Hands striped vest

It seems ridiculous that we’ve reached the third month of the year, and I’ve only just finished my first knitting project. If I’m being accurate, it was finished in late February, but that fact doesn’t seem to diminish the level of ridiculousness. Anyway, enough grizzling. Onward and upward!

Striped vest

Tailored waistcoat from Golden Hands Volume 1 (page 6)
About 180g Bendigo Woollen Mills Rustic 8ply, Graphite
About 100g Bendigo Woollen Mills Rustic 8ply, Flannel
4.00mm and 3.50mm needles
Start: November 2010
Finish: February 2011
Modifications: none that I can recall
Ravelryed: here

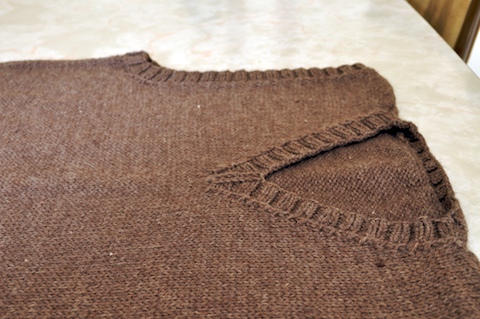
I’m mostly pleased with how the vest turned out. The curved front pieces are a really nice touch, as is the invisible cast on which was used on all the ribbing. Almost all the ribbing was knit as separate pieces and seamed, which was a necessary evil given the cast on. I did notice though that the ribbing did not hide sloppy seaming; I ended up having to redo the ribbing around the armholes because my sloppy finishing resulted in the ribbing bulging out. Once I stopped being lazy and started paying attention to what I was doing, the ribbing came out really nicely.

curved front

At the moment I’m hesitant to call the vest a success because of two pretty big things that I’m uneasy about. The first is the waist shaping: the shaping from hip to waist is pretty severe which makes that section jut out a bit. It’s possibly only noticeable only to me, but if I had my time again, I’d space the increases out a little more.
too short?

The second is the length: as I was knitting the back it looked like it was bordering on being too long, but when I tried it on, it was bordering on too short. I’ve given it a pretty severe blocking, but am not sure it’s helped much. Unfortunately I’ve run out of graphite, so it’s not possible to add in a couple more stripes. I’ll just have to learn to live with it.

Although I have a couple of reservations (none of which I might add are fatal flaws, but merely things to be wary of), it is a pretty straightforward pattern and it makes for a nice plain vest. If you are interested in this pattern and are located in Australia, it’s worth scouting around op shops as I often see copies of Golden Hands in the ones I frequent.

Now that I’ve finished something, it feels like my crafting year has finally commenced. It’s such a relief to know that I’ll have at least one finished project this year!

The sum of parts

In the last week I’ve politely asked the pattern reading fairy to leave, downloaded more podcasts and got on with the job of knitting and finishing. Thanks to DrK for alerting me to the fairy’s existence (made it much easier to get rid of her once I knew she existed!) and everyone’s podcast suggestions.

The sudden burst of motivation has resulted in the near completion of My Golden Hands vest. It’s probably really silly to feel like this, but I find this part of a knitting project really exciting. No longer does it look like a pile of related pieces, but an actual garment. Even seeing the parts come together neatly with mattress stitch is still slightly magical. Small things…

vest nearly done

It turns out that adding light grey stripes was a really good idea. I’ve had to unravel my swatch of dark grey Rustic for seaming, which means that I had pretty much just the right amount of dark grey for the vest.

The most difficult, or more accurately, annoying, part of the vest so far has been attaching the button band to the front pieces. Because it’s so long, I put it off as I thought it would be a tedious job. As is often the case though, once I started and got into a rhythm, it wasn’t too bad. At the moment it’s looking pretty good, bar slight lumpiness around the curved fronts. Let us hope a good wet block will sort that out.

The quest for a silver lining

It’s been very humid here over the past week. Miserable weather is generally associated with the cold, but for me, this is properly miserable. Sticky, energy-sapping and generally uncomfortable.

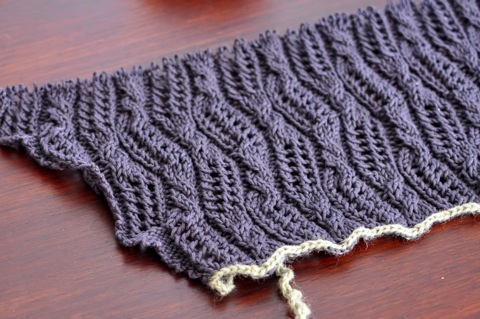
Because the weather is so, I haven’t been knitting very much. However, I did decide that it was far too hot to be working on my two wool projects, so I cast on Lyttelton in grey (did you expect anything else?) Rowan Cotton Glace.

DSC_0718.jpg

The rows are a lot more time consuming than my usual stocking stitch, but the lovely trellis stitch makes it all worth it. Having said all that, I’m just about the rip out the whole lot as I don’t like how I’ve incorporated the pattern into the increases. It seems a shame to rip out all that work but it’s much better to start again than persist with something you’re unhappy with.

DSC_0723.jpg

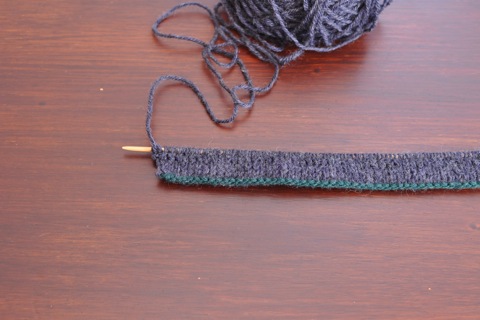
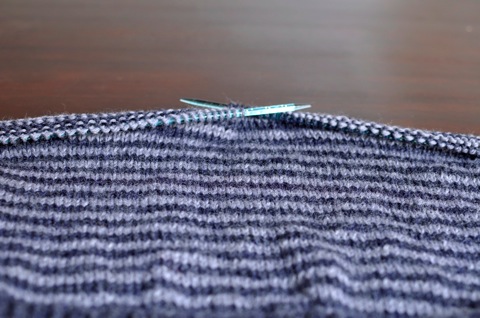
While contemplating ripping out Lyttelton I reverted back to knitting with wool and started on the armbands for my stripy vest. All was going well there until discovering that I’d lost one of my knitting needles between the house and the train station yesterday morning. Chalk that up as one more reason to buy circular needles, something that I will do after writing this post. I’m also a bit concerned that there might not be enough yarn for the bands at the front, so I’ll think happy thoughts again, given how effective it was for Matt’s Dashing Jumper.

The mildly grumbly tone of this post is completely unwarranted given the terrible flooding in Queensland (and since I originally wrote this, New South Wales, Victoria and Tasmania on a smaller scale, and also Brazil and Sri Lanka). It’s terribly disarming watching the news and reading the paper, knowing I cannot help with sandbagging or cleaning or fostering animals… or just not be completely useless besides donating money. Having a few problems with my knitting projects pales in comparison.

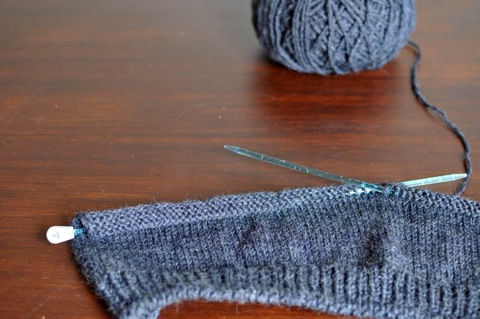
The stripes have it

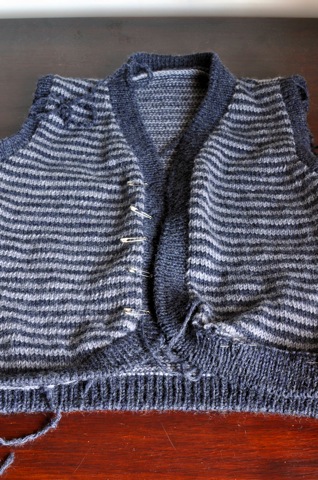
vest plus stripes

Thanks everyone for your opinions on how to proceed with the vest. As you can see, the stripes won.

Despite my rash claims that there was nowhere near enough yarn, there may have been *just* enough to make the vest in one colour. However, I’m not much of a risk taker and having non-matching sections from different dyelots simply wouldn’t do. The gentle prodding in the comments and the fact the two greys look good together may have also played a part in the final decision…

Initially I was a little concerned that the two-row stripes were a bit wide, particularly because I envisioned stripes a la Treeline Cardigan. As I’ve knit more and more, the stripes seem fine as they are. Who knows, with my current enthusiasm, this may end up being my last finished object for the year!

A duffer’s knitting dilemma

Last weekend, I had every intention of taking a photo of the pile of neatly blocked pieces of Matt’s jumper, but I got a bit excited and started seaming instead. As my seaming-in-progress photos look like yarn monsters rather than almost-jumpers, I shall instead write about my latest bout of dufferism (a disease for which I’m convinced there is no cure).

Before getting to the dufferism, there is a backstory. As a kid, I used to page through Mum’s sets of craft books. One set, the name of which name I cannot remember (I’d be forever grateful to anyone who could tell me what they were called) had white vinyl covers with gold writing, and the other was Golden Hands.

Both sets of craft books went to the op shop during my teens, and were almost forgotten until I saw an almost the complete set of Golden Hands books at an op shop a few years ago. My strong sense of nostalgia never fails me, so I bought the almost complete set on the spot.

Old craft books are a wonderful mix of comedy, cringe and good ideas. I decided that this vest pattern from Golden Hands Book 1 fell into the last category.

golden hands vest

The pattern suggested that I’d need less than 200 grams of 8ply to make the vest. I was a bit sceptical of this claim, particularly given that there was no yardage accompanying the yarn requirements, but I had some stashed Bendigo Woollen Mills Rustic 8ply in Graphite that I thought would work with the pattern. It seems I was right to be sceptical, as I’m not even half way through the back and there is no way I will have enough yarn to finish the vest.

outta yarn

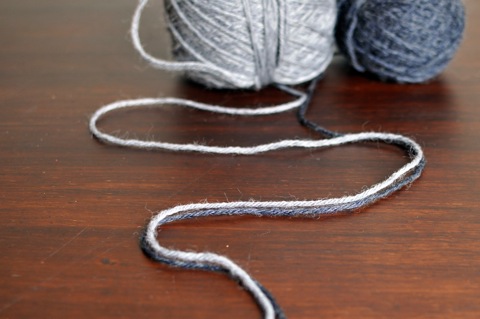
As far as I can tell, I have three options. I can frog it and forget about the whole episode, buy some more yarn, or frog back to the ribbing and make a striped vest using some more stashed Rustic in a different colour. The first option’s been dismissed already but I can’t decide between the two remaining options. I bought the graphite Rustic some years ago and the label’s long gone, so matching dyelots isn’t really possible. There’s generally little variance in Bendigo Woollen Mills dyelots, but it’s still a bit risky. The alternative is to use some stashed Rustic 8ply in flannel, a light grey.

graphite and flannel together

Graphite and flannel go quite well together, and it would help use up more stash, but I’m not sure if I’ve got much in my wardrobe that goes with a striped vest. At the moment I’m leaning towards flannel stripes, but I’m not 100 per cent sold on the idea.

Dilemmas dilemmas. Sometimes it’s hard being a duffer.

The sea the sea, the stockingette sea

A more organised blogger might have a few blog post ideas squirrelled away for times where there’s not much to blog about. Sadly, I’m a fairly disorganised blogger, so I’ve let the blog go fallow again. I have been busy knitting while I’ve been away though.

Grandfather vest, finished

Grandfather Vest by Veronik Avery
1.25 balls Bendigo Woollen Mills Classic 8ply, Anthracite
4.50mm needles
Start: August 2010
Finish: September 2010
Modifications: different yarn, and that’s it!
Ravelryed: here

As soon as I saw this vest, I knew I had to buy the book that it’s from, Knitting 24/7. It’s a book that’s full of good staples like scarves, jumpers, shawls and socks, so although I primarily bought it for the vest pattern, there are enough interesting patterns to make it a good buy (especially if purchased via the wonderful Booko).

The vest pattern is very straightforward as it’s knit in the round up to the armholes. I think that’s the reason why its completion snuck up on me — it’s very easy to get into a trance-like state knitting stocking stitch in the round. Before you know it you’re staring at a pretty much completed vest that just needs buttons sewn on to be done and dusted.

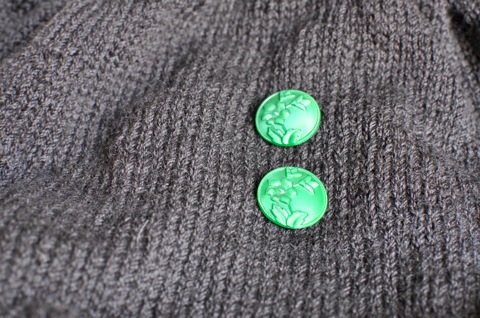
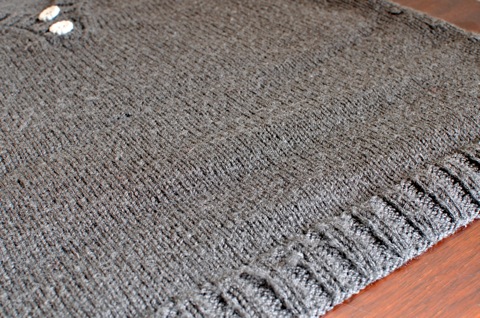
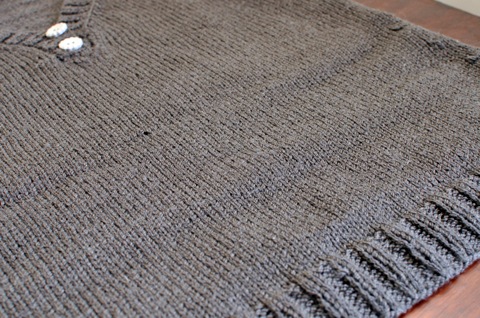
green buttons

I was originally planning to use a pair of lovely green glass buttons that I received for my birthday last year. However, while in my trance-like state, I decided that the grey/brown fabric and the green weren’t meant to be together. This left me in a slight state of indecision as I hadn’t considered any other yarn/button pairing, but then these grey buttons jumped out at me as I was sifting through my button collection:

grey buttons

The yarn used was probably the oldest yarn I had stashed away, so it fit in nicely with the ‘first in, first out’ stash theory. It was purchased in either 2004 and 2005, and was leftover from a hat and scarf I knit for a friend. While it’s a good policy to make sure there’s more than enough yarn to cover the project you’re working on, my aversion to running out of yarn resulted in my having around 400 grams extra, which is a tad excessive. Having said that, these leftovers have given me a very wearable item of clothing, so my whinging is minimal.

The colourway, Anthracite, is a bit of a strange one. Under some light it looks quite grey, and in others, very brown. I think it’s a colour that was produced for only one or two seasons which is understandable — it was very hard to get a good idea of what the colour was like from just the shade card.

I’m a little disappointed with the fabric I produced with this yarn, as it’s a bit uneven in places even after blocking. I’ve used Classic 8ply before and gotten very neat results so I’m at at bit of a loss to explain why it’s not so good this time round. Hopefully it’ll even up as I wash and wear it.

It seems my trance-like state was very productive, for as I was creating round after round of stocking stitch, I decided to make the cabled jumper for Matt rather than the striped raglan. As much as stocking stitch makes for good commute projects, I found myself wishing for something a bit different. Something with cables should scratch that itch, even if it flies in the face of ‘first in, first out’.

Uncropped, untryst vest: a tutorial

Since finishing my green vest a little while ago, I’ve had a couple of questions about how I lengthened the vest (the original pattern is for a cropped vest). With the permission of the designer, Kristen TenDyke, I thought I’d put up some notes about how I went about it. This is my first proper attempt at explaining alterations to a pattern, so please forgive me if it goes into too much detail, or not enough.

Some caveats before I start: the modifications worked well with the yarn I used, the garment size and my body type. You may need to go about things a little differently in order to make it work for you. These notes are meant purely to give an idea of one way the vest can be lengthened to sit at the hip, rather than starting from the ribs. These suggestions should be read in conjunction with the original pattern, which can be found here.

All numbers used will be based on the medium size, which is the size I made. The numbers are there to give a concrete example of how the shaping works, rather than just trying to explain it in abstract terms.

DSC_0872.jpg

The shaping I used follows a basic hourglass form; the width decreases from the hip to the waist, and then increases from the waist to the armholes. In a nutshell, I did a mirror image of the waist to armhole shaping. Hopefully the photo above shows that shaping clearly enough.

Back

The number of stitches cast on is equal to the number of stitches just before the armhole decreases. So, in the case of the medium size, I cast on 80 stitches rather than 72. The border is worked as instructed in the pattern. The shaping is then worked as follows:

Starting from the first row after the border, I decreased both sides every 10 rows, 4 times. This left me with 72 stitches — the number you would cast on if making the original version. From here I knit 4 rows, then followed the pattern as written. The 4 rows in between the decreases and increases were added to ensure I got the right length for my body.

In some ways, the medium is a bad example because it has the most straightforward shaping. If I were making the small size, I would do the waist shaping as follows:

Starting from the first row after the border, decrease each side every 8 rows once, and then every 10 rows 3 times.

Essentially, you’re reversing the waist to armhole shaping in two ways; instead of increasing, you’re decreasing, and you’re reversing when the decreases are made (rather than every 10 rows x 3 and every 8 rows x 1, it’s every 8 rows x 1 and every 10 rows x 3). The reason I would do it this way is for symmetry. However, I don’t know if it would make that much of a difference.

Front Pieces

For the front you just need to cast on half the back stitches for each front piece. So for a medium, just cast on 40, rather than 80. Follow the same pattern with the decreases (but just for one side), remembering to cast off 5 after the border to account for the button band.

The length of the piece before decreasing for the neck can be calculated as follows:

length before neck shaping = length covered by the hip to waist decreases (do not include the border, but do include any extra rows before the waist to armhole increases) + the length specified in the original pattern.

For me, 14.5cm (5.75 inches) covered the decreases from hip to waist, plus the 4 rows of stockingette. Add that to the length of the piece specified in the pattern before starting the neck shaping (6.25 inches for medium), making the front pieces measure 30 cm (12 inches) before starting the neck shaping.

I followed the pattern after that point. All decreases (waist to arm hole, and neck) were worked as in the pattern.

Buttonband

I winged this bit the most out of all the modifications. I picked up the number of stitches around the neck as specified in the pattern. However, down the fronts, I picked up roughly one stitch for each row, ensuring the same number of stitches were picked up on both front pieces. As I roughly doubled the length of the vest, I put in 8 buttonholes. Because the pattern calls for rather bulky yarn, I recommend putting in more buttonholes rather than less. The bulk can result in pulling between the buttonholes which is a hard look to pull off. Having more buttonholes alleviates this issue.

I’m reluctant to give stitch numbers here, as it’s highly dependent on the length of the vest and how many stitches you pick up around the edges. Ultimately, just take the number of stitches picked up between along the fronts, divide it by the number of buttons you want and move the numbers around so the number of stitches between buttonholes are pretty much the same (e.g the number of stitches between buttonholes alternated between 7 and 8 stitches for me).

So, that’s all the alterations I made to the pattern to come up a vest that sits at the hip rather than the waist. I hope that it’s useful for anyone who’s thinking of making a longer version of the vest, and doesn’t add confusion. If any of my instructions are unclear, please let me know and I’ll try to explain it better.
Dad’s vest

Dad’s vest was finished in time for his birthday today, but unfortunately he’s not in possession of it at the moment…

DSC_0284.jpg

Conservative (but pretty!) Vest (rav link) by Julia Trice
9 balls of Lincraft Balmoral Tweed
3.50 and 4.00 mm needles
Start: April 2009
Finish: May 2009
Ravelryed here

It was a rush at the end, but thought two days was plenty of time for it to dry on the blocking mat, to be sent on Thursday. It was dry on Friday, three days after I put it out to block. True, I could sped up the process, but silly me took for granted that it wouldn’t take that long to dry and only realised it was still wet as I went to fold it up and send it off.

Measuring it against ‘the template’, it looks like a pretty close match. As it’s a firmer fabric, with less give than ‘the template’, I’ll reserve my full judgement on the project until I see Dad in it. If I can nab a photo of him modelling it, I’ll post it here.

DSC_0278.jpg

Although the length and width of the vest is heavily based on ‘the template’, the pattern I used in conjunction was very helpful in terms of shaping. I owe the designer, Julia of Mind of Winter, a great deal of gratitude for her help and patience when I got myself completely confused and in a knot about the shoulder decreases. Turns out I had them reversed on the back, creating an overhang at the armhole side. Instead of doing the sensible thing and trying to work it out when I wasn’t so tired, I got in contact with her to see if I had made a silly mistake that everyone bar me could see. Turns out, I had, and she was just lovely when I explained what a fool I had been.

The whole vest took around 450 grams of Lincraft Balmoral Tweed. I must admit to having a bit of a mental block about Lincraft branded yarn, but I found this yarn fine to work with. The occasional slub added to the tweediness and it bloomed beautifully with a wet blocking. It is a discontinued yarn, which is a shame as I have a couple of projects in mind that would have been great in Balmoral Tweed.