Uncropped, untryst vest: a tutorial
September 5th, 2009
Since finishing my green vest a little while ago, I’ve had a couple of questions about how I lengthened the vest (the original pattern is for a cropped vest). With the permission of the designer, Kristen TenDyke, I thought I’d put up some notes about how I went about it. This is my first proper attempt at explaining alterations to a pattern, so please forgive me if it goes into too much detail, or not enough.
Some caveats before I start: the modifications worked well with the yarn I used, the garment size and my body type. You may need to go about things a little differently in order to make it work for you. These notes are meant purely to give an idea of one way the vest can be lengthened to sit at the hip, rather than starting from the ribs. These suggestions should be read in conjunction with the original pattern, which can be found here.
All numbers used will be based on the medium size, which is the size I made. The numbers are there to give a concrete example of how the shaping works, rather than just trying to explain it in abstract terms.
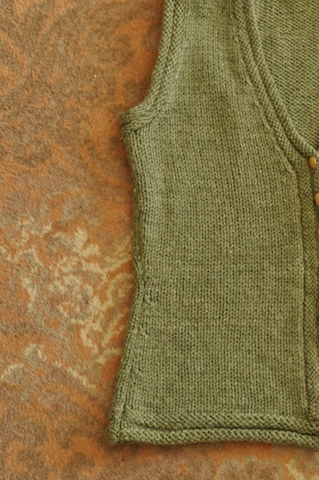
The shaping I used follows a basic hourglass form; the width decreases from the hip to the waist, and then increases from the waist to the armholes. In a nutshell, I did a mirror image of the waist to armhole shaping. Hopefully the photo above shows that shaping clearly enough.
Back
The number of stitches cast on is equal to the number of stitches just before the armhole decreases. So, in the case of the medium size, I cast on 80 stitches rather than 72. The border is worked as instructed in the pattern. The shaping is then worked as follows:
Starting from the first row after the border, I decreased both sides every 10 rows, 4 times. This left me with 72 stitches — the number you would cast on if making the original version. From here I knit 4 rows, then followed the pattern as written. The 4 rows in between the decreases and increases were added to ensure I got the right length for my body.
In some ways, the medium is a bad example because it has the most straightforward shaping. If I were making the small size, I would do the waist shaping as follows:
Starting from the first row after the border, decrease each side every 8 rows once, and then every 10 rows 3 times.
Essentially, you’re reversing the waist to armhole shaping in two ways; instead of increasing, you’re decreasing, and you’re reversing when the decreases are made (rather than every 10 rows x 3 and every 8 rows x 1, it’s every 8 rows x 1 and every 10 rows x 3). The reason I would do it this way is for symmetry. However, I don’t know if it would make that much of a difference.
Front Pieces
For the front you just need to cast on half the back stitches for each front piece. So for a medium, just cast on 40, rather than 80. Follow the same pattern with the decreases (but just for one side), remembering to cast off 5 after the border to account for the button band.
The length of the piece before decreasing for the neck can be calculated as follows:
length before neck shaping = length covered by the hip to waist decreases (do not include the border, but do include any extra rows before the waist to armhole increases) + the length specified in the original pattern.
For me, 14.5cm (5.75 inches) covered the decreases from hip to waist, plus the 4 rows of stockingette. Add that to the length of the piece specified in the pattern before starting the neck shaping (6.25 inches for medium), making the front pieces measure 30 cm (12 inches) before starting the neck shaping.
I followed the pattern after that point. All decreases (waist to arm hole, and neck) were worked as in the pattern.
Buttonband
I winged this bit the most out of all the modifications. I picked up the number of stitches around the neck as specified in the pattern. However, down the fronts, I picked up roughly one stitch for each row, ensuring the same number of stitches were picked up on both front pieces. As I roughly doubled the length of the vest, I put in 8 buttonholes. Because the pattern calls for rather bulky yarn, I recommend putting in more buttonholes rather than less. The bulk can result in pulling between the buttonholes which is a hard look to pull off. Having more buttonholes alleviates this issue.
I’m reluctant to give stitch numbers here, as it’s highly dependent on the length of the vest and how many stitches you pick up around the edges. Ultimately, just take the number of stitches picked up between along the fronts, divide it by the number of buttons you want and move the numbers around so the number of stitches between buttonholes are pretty much the same (e.g the number of stitches between buttonholes alternated between 7 and 8 stitches for me).
So, that’s all the alterations I made to the pattern to come up a vest that sits at the hip rather than the waist. I hope that it’s useful for anyone who’s thinking of making a longer version of the vest, and doesn’t add confusion. If any of my instructions are unclear, please let me know and I’ll try to explain it better.
May 22nd, 2010 at 10:16 pm
Thank you for sharing this. It is perfect. I saw the vest and wished it was more like yours and here you are!
January 26th, 2013 at 1:58 am
Thanks so much for this. I wanted a longer version too. Great support! I love Kristen Tendyke’s designs and appreciate having options to modify them