March 14th, 2016
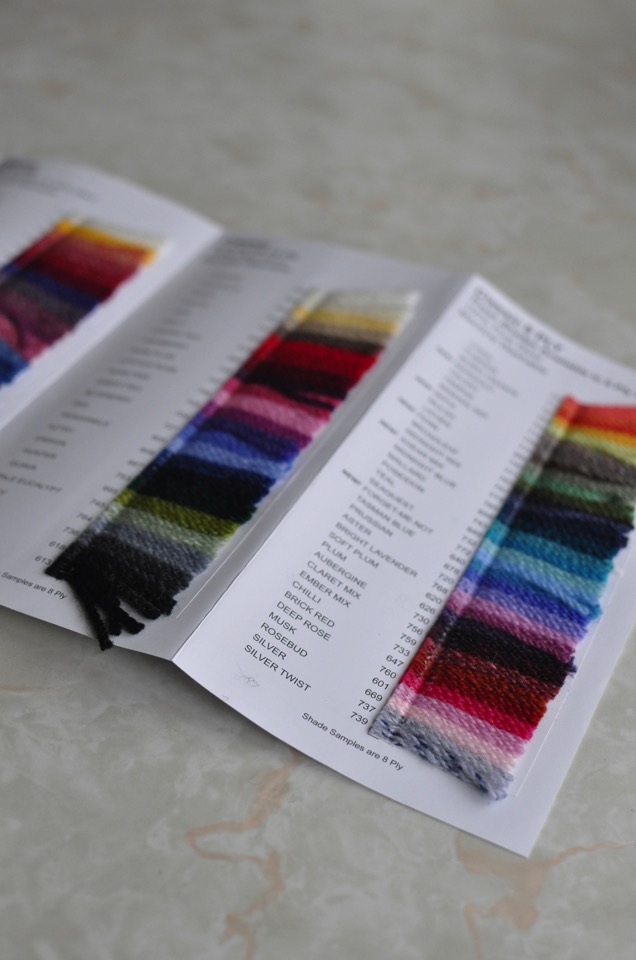
This year’s shade card from Bendigo Woollen Mills arrived right in the middle of a warm and very humid week, when anything associated with knitting seemed like the most unappealing thing in the world. Now that the temperature and humidity has dropped, I feel brave enough to crack the shade card open and have a squiz.
Luxury
- Bubblegum (pink, shade number 356), Gumleaf (mid green, 357) and Shadow (light grey, 364) added to the 8 ply range
- Shadow and Sunrise (bright red, 336) added to the 10ply range
- Fuchsia (pink, 303), Sorbet (peach, 350) and Forest (dark green, 360) discontinued in the 8ply range. Fuchsia and Forest were also discontinued from the 10ply range.
Classic
- Marigold (yellow, 769), Sepia (grey brown, 770), Fern (mid green, 771), Aegean Mix (dark blue marl,773) and Forget-me-not (light blue, 772) added to the 8 ply range
- Grey (light grey, 764) added to the 2/3/5/8/12 ply range
- Red Berry (light cranberry, 638), Denim Mix (blue grey marl, 676), Mulberry (pink/purple, 748), Blazer (dark blue, 754) and lilac (light purple, 762) have been discontinued in their entirety. Plum (dark purple, 626) is now only available in 8 ply.
Stella
- Calcite (sunflower yellow, 162), Spinel (red, 163) and Purple Quartz (purple, 173) added.
- Fluorite (light purple, 111), Purple Jasper (light purple, 117) and Beryl (magenta, 159) discontinued.
I’m really pleased to see bright, sunny yellows in Classic and Stella. Last year I bought a cardigans worth in similar shade from the Bendigo Woollen Mills back room (though not in Classic or Stella), so while I probably won’t be buying more it’s still nice to see it in the shade card. There’s no discontinuations that are particularly distressing, so no panic buying for me.
How about you?
Posted in Knitting | No Comments »
March 25th, 2015

I’m not much of a yarn collector, but the release of the Bendigo Woollen Mills shade card in March each year is one of my favourite annual yarn events. It’s not as much a surprise as in previous years, because the new colourways seem to be put up on the Bendigo Woollen Mills website prior to the shade cards arriving. However, it’s till fun to pour over the little samples of yarn, celebrating the additions and mourning the losses.
Luxury
- Sorbet (peach, shade number 350), Bermuda (mid blue, 352) and Sangria (maroon-ish, 351) added to the 8 ply range
- Baby Blossom (light pink, 321), Tangerine (orange, 347) and Bermuda added to the 10ply range
- Baby Pink (very light pink, 318), Autumn Glow (rusty red, 362) and Pine (dark green, 305) discontinued in the 8ply range. No colourways were discontinued in the 10ply range.
Classic
- Teal (694), Aubergine (730), Burnt Orange (767) and Bright Lavender (768) added to the 8 ply range
- Smoke (736) added to the 2/3/5/8/12 ply range
- Nectarine (light rusty red, 616), Midnight Green Mix (dark green marl, 755), Evergreen (forest green, 766) and Currant (reddish purplish brownish, 761) have been discontinued in their entirety. Rosebud (light pink, 669) now only available in 8 ply.
Stella
- Beryl (deep pink, 159), Blue Zircon (mid blue, 160) and Tanzanite (tealy blue, 161) added.
- Citrine (light yellow, 109), Pink Pearl (light pink, 112) and Peridot (light yellow-green, 157) discontinued.
There’s nothing of great excitement or disappointment for me in this year’s shade card. Of the colourways that have been introduced, the only one I’m interested in is Sangria in Luxury, but need to see it in the ball to get a better idea of the colour. I was quietly hoping that some of the marled colourways in the Classic range would be offered in other plys (plies?), but alas, that was not the case this year. Stella is still not really doing it for me, but I think the general semi-precious stone theme for the colourway names is rather apt for such a shiny yarn.
So, no panic or celebratory purchasing for me this year. What about you?
Posted in Knitting | 1 Comment »
November 9th, 2014
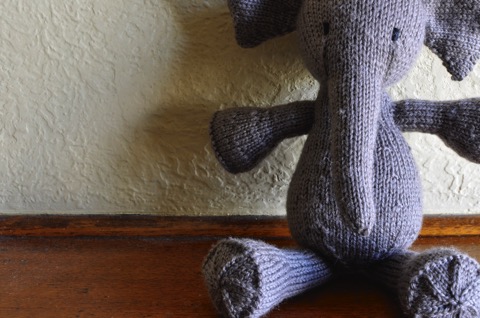
Elijah by Ysolda Teague
Approximately 100 grams of Bendigo Woollen Mills Luxury 8ply, Bark
Black embroidery thread
3.25mm double pointed needles
Started: August 2014
Finished: September 2014
Ravelryed: here
A couple of months ago, my Mum asked me to whip up an Elijah for a colleague’s baby. Because it’d been over four years(!) since I’d made my last Elijah and Mum asked nicely, I obliged. I didn’t have anything suitable in my stash, so I sent Mum off to the Bendigo Woollen Mills for some Luxury 8ply in her choice of colour. The colourway Mum chose, Bark, was the perfect colour for a knitted elephant. That’s not to say that a knitted elephant should be any colour in particular, but that grey/brown shade seems to be the one I’ve gravitated towards for previous Elijahs.
This is my fourth go around the pattern so there’s not much to add to my previous three experiences. I still find the cast on for the head quite tricky, but this video helped a lot. In particular, I previously divided the cast on stitches across the three dpns right away, where this tutorial suggested knitting the first couple of rounds like an icord. Revolutionary!
Like always, it was difficult to let him go to his new home. Maybe Elijah V will be mine.
Posted in Finished objects, Knitting, Toys | 1 Comment »
October 19th, 2014
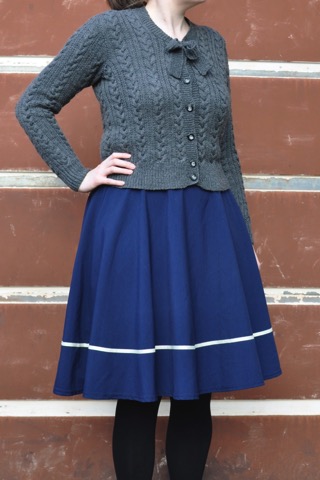
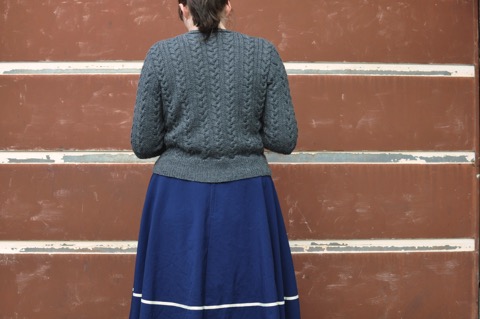
Ti-Cable Stitch Cardigan from A Stitch In Time, Volume Two
400 grams Patons Dreamtime 4ply, Charcoal
3.75mm and 3.00mm needles
Started: November 2013
Finished: August 2014
Modifications: Nothing!
Buttons: Buttonmania
Ravelryed: here
Since casting this cardigan on in November last year, I was excited about wearing it. The whole process was an illustration of an ideal knitting project; I really enjoyed seeing the marled grey cables come together to form braids up the body and arms, and often daydreamed about wearing it once it was done. In stark contrast to my usual knitting behaviour, I managed to finish it while there were plenty of weather-appropriate days left to wear it.
There were no modifications made to the pattern, as my gauge was spot on and everything seemed to come together reasonably well. Noting that I’m never completely happy, I had a crisis of confidence over the length of the sleeves at one point. They are longer than I usually wear, but not ‘too long’ as I moaned to friends and family, who patiently sat through me demonstrating the length of the sleeves prior to seaming them to the body.
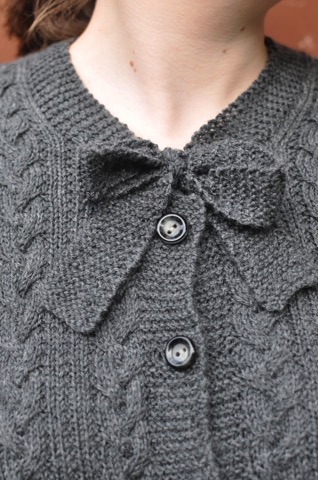
If I were to make this again, I’d shorten the sleeves slightly, lengthen the ties and deal with the lip at the bottom of the cardigan, caused by the knitted-in button band. Like the sleeves, the button band isn’t a deal-breaker, but I think knitting and seaming on a separate button band would make for a slightly nicer finish. These are, however, minor quibbles; the cardigan was a joy to make and is now a joy to wear.
Posted in Cardigan, Finished objects, Knitting | 2 Comments »
July 20th, 2014
Anyone with even a tenuous connection to any Australian knitters on Ravelry would know that the Bendigo Sheep and Wool show was this weekend. This year, I got there first thing on Friday morning. It’s the first time I’d been on a Friday, and although I was mentally prepared for pointy elbows and doorbuster sale-style stampedes, it was all rather polite and calm (and cold!).
My approach to the show has become a running joke, because I can easily walk away from the Bendigo Showgrounds without any yarn in my hands. I think a lot of this comes from what is sold at the show; I’m not a spinner, and tend not to knit with semi-solid and or variegated yarn. Because of these rather strong knitting feelpinions, there are only a few stalls selling things of interest to me. This, therefore, makes it easier for me to walk away empty-handed. In spite of all those knitting dietary requirements, I ended up coming home with a few purchases this year.
Prior to the show, I’d been considering knitting myself a new set of mittens. My old mittens have provided me with many years of good service, but they’ve begun to look quite tatty. They really didn’t have much of a chance, given that one of the yarns I used was Malabrigo Worsted. They pilled like nothing else soon after the first wear, and it’s been all downhill from there. Before I knew it, the show was upon us and there was no time to make new mittens. So, I did the next best thing and bought some yarn at the show to turn into mittens, hopefully in time for next year’s show.
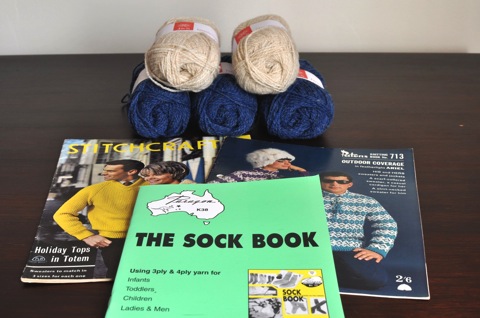
Instead of the soft and pilly Malabrigo, I bought for the exact opposite. Jamieson and Smith 2ply Jumper weight is rough and robust and perfect for a pair of mittens that will likely get knocked around. I’ve wanted to try this yarn for an age, so when I spied The Purlbox‘s stall, I made a beeline for the neat rows of lovely heathered colourways. Eventually the yarn will become a pair of Snowdrift Mittens, another pattern I’ve wanted to knit for a while.
Besides the yarn, the only other knitterly things I picked up were a couple of vintage knitting pattern booklets from Onabee. Nothing particularly exciting of note, but The Sock Book from Paragon has quite a few men’s sock patterns in there that may result in socks for Matt at some point.
So, that’s Bendigo for another year. Probably quite modest by most other’s standards, but one of the most extravagant Bendigo outings I’ve had for a while.
Posted in Gloves and mittens, Knitting | 1 Comment »
June 15th, 2014
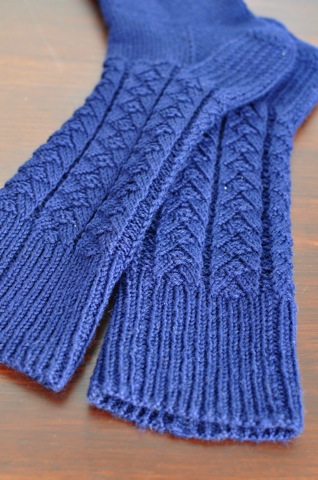
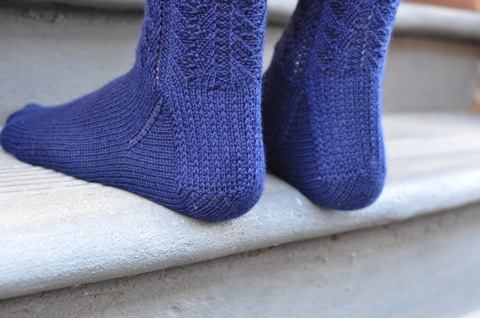
Herringbone Socks from New Sock Fashions in Wool by Styled by Hilda, via Free Vintage Knitting Patterns
120-ish grams Patonyle 4ply, Navy
2.25mm and 2.50mm needles
Started: April 2014
Finished: May 2014
Modifications: Switched back to the smaller needles for the foot
Ravelryed: here
Whew. Now I’ve got the last post off my chest (thank you everyone for your kind words about the jumper), I can move onto happier things.
Over the Easter break, I wanted to do work on something that wasn’t a cardigan so I cast on these socks. They were a dream to knit; the pattern was interesting but easy to remember, the slip stitch heel flap created a lovely spongy fabric and even the most monotonous part of the sock (the feet) flew by. This is how I remember knitting being.
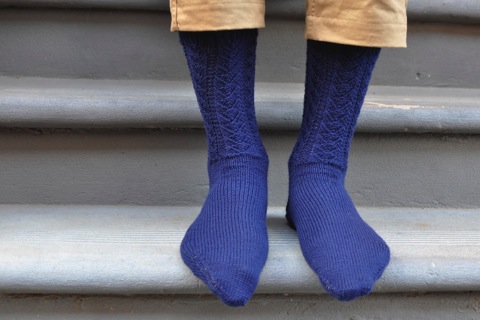
I really liked the not-very-herringbone herringbone pattern, but it does look a bit gappy on Matt’s skinny legs. The decreases for the toe and heel suffer from the same gappiness, so I wonder if it was a combination of the pattern, the yarn and my technique. It doesn’t matter too much, as Matt seems very happy with them and they still look quite handsome despite the flaws. It’s also another addition to his sock drawer; hopefully one day soon we’ll reach a point where handknit socks are for wearing and not just for admiring and worrying about destroying them through wear.
Although I didn’t end up finishing them by the end of the Easter break, I did finish them at the same time as Matt finished a wee project he’d been working on for the last few months (avert your eyes if you’re sensitive to product plugs, there’s a shameless one ahead). It’s called RavExporter, which is a plugin for iPhoto and Aperture that allows Ravelry users to export their photos directly from iPhoto or Aperture into a project or stash item. The backstory is that I use Aperture on my Mac to store all my photos, and it can get quite unwieldy when I’m trying to import stash or project photos into Ravelry. So, Matt wrote this plugin so I could get my photos into Ravelry more quickly. Productivity! If you’re a Mac user that uses Ravelry, do check it out. We’d love to hear what you think of it.
Posted in Finished objects, Knitting, Socks | 2 Comments »
May 25th, 2014
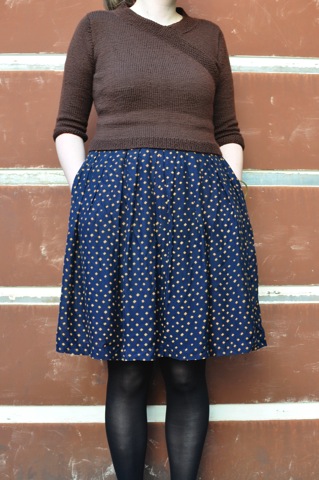
A Becoming Cross Over Line from Family Knitting in Thick Wool (from My Home Magazine)
400-ish grams Bendigo Woollen Mills Luxury 8ply, Acorn
3.25mm and 4.00mm needles
Started: June 2013
Finished: March 2014
Modifications: Where do I begin?
Ravelryed: here
This project was an excellent example of the gulf that sometimes exists between perception and reality.
I chose this project as my knitting travel companion for a holiday last year. The other contender was my Tri-Cable Stitch Jumper, that four-ply cable number from A Stitch In Time Volume Two. At the time, a cropped, mostly stockinette, 8ply jumper seemed to be the project that would cause the least amount of hassle while traveling around.
This is the point where my perception of the project became divorced from reality. In the few blog posts since coming back from the holiday, I’d mentioned the many hassles I’d had with the pattern. In the end, these are the modifications I made:
- Cast on more stitches for the waist
- Dropped the neckline, affecting the two front pieces and the neckband
- Removed the buttonholes from the neckband
- Knit the sleeves using Tasha’s top down in the round method
- Seamed up the neckband so it became a pullover rather than button up jumper.
By the time I’d gotten to the fourth or fifth attempt at the sleeves, I was worn out and became lazy. So, the sleeves shows the scars of a yarn that has been frogged and knit and frogged and knit and frogged and you get the picture. I’m hopeful that as I wear and wash it, the scars will settle to charmingly minor variations in the fabric.
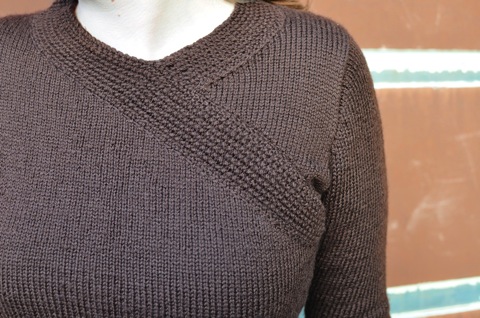
Once I worked out that I could seam up the neckband and still be able to fit my generously-sized head through the hole, I quickly seamed it up and called it done. The point where the sides meet up to make the v is very wonky and disappointingly unpolished, but there comes a point in some project’s life where it just needs to be finished.
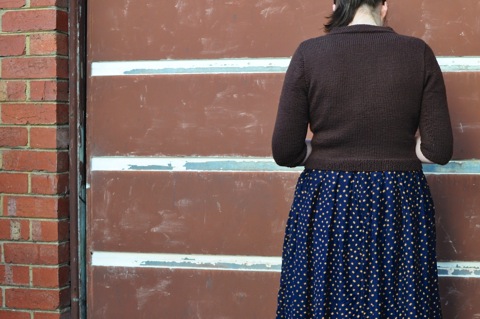
Despite feeling mildly exhausted and disappointed whenever I wear it, it turned out not too bad. I really like the length of the sleeves and the cropped length makes it perfect for the fit and flare dresses I wear it with. I most certainly won’t be making this pattern again, but cropped jumpers and cardigans definitely have a place in my wardrobe.
This jumper seems to epitomise the difficulty that sometimes comes with vintage patterns; when you run into trouble, you’re generally on your own. This time the battle was worth it, but lordy did it ever try my patience!
Posted in Finished objects, Jumper, Knitting, Vintage | 2 Comments »
March 13th, 2014
Yep, it’s new shade card time already. I heard rumblings that it was arriving this week, so I was more than a little antsy when the shade card was not ready waiting for me on Tuesday. I’m guessing for most of you this will be old news, but the compulsion to drone on about which colourways Bendigo Woollen Mills has decided are in and which are out overrides any concern about being behind the news curve. I get one opportunity a year to get my BWM colourway spreadsheet out (seriously), so I’m not going to miss it.
Here’s the summary of the difference between this year’s and last year’s shade card:
Hello/Goodbye
- Rustic and Alpaca Rich have been discontinued in their entirety
- Stella (50% bamboo, 50% wool) has been promoted to the main shade card, and expanded to include 17 new colourways
Luxury
- Tangerine (bright orange, shade number 347), Cerise (pink, 348) and African Violet (light blue-purple, 349) added to the 8 ply range
- Fuchsia (303) added to the 10ply range
- Wild Barley (light green-yellow, 323), Cork Brown (light brown, 355) and Iris Mist (light blue-purple, 366) discontinued in the 8ply range. No colourways discontinued in the 10ply range
Classic
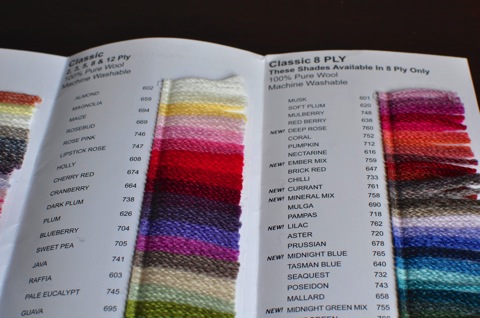
- Maize (cheery yellow, 694) and Hunter (dark green, 753) added to the 2/3/5/8/12 ply range
- Deep Rose (rosy pink, 760), ember mix (red/green marl, 759), currant (reddish purplish brownish, 761), Mineral Mix (green/red marl, 758), Lilac (very light purple, 762), Midnight Blue (very dark blue, 765), Midnight Green Mix (dark green marl, 755), Evergreen (forest green, 766), Broadleaf (olive green, 763), Grey (light blue-grey, 764), Midnight Mix (dark blue/red marl, 757) and Claret Mix (maroon/dark red marl, 756) added to the 8 ply range
Interesting (to me) observations
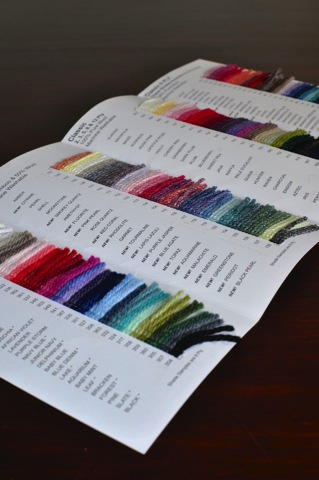
- The paper stock is a lot thinner than previous shade cards. This may (or may not) have something to do with the fact this year’s shade card has four folds, rather than three folds used in previous cards.
- Classic has been split into two sections on the shade card; in one section are the colourways that come in 2, 3, 5, 8 and 12 ply, and in the other section are colourways that only come in 8 ply. I like this layout a lot.
- The pattern selection has been expanded a lot. There are 13 patterns featured on this shade card, nine more than last year.
The biggest change in this shade card the the end of Rustic and the expansion of Stella. It’s ridiculous to mourn a yarn I haven’t used in years, but when I did use it, I really liked it. I hope that it comes back in some form, even as a limited edition release. Out of all the discontinuations, Rustic is the only thing I would consider panic buying.
Adding to my disappointment is the introduction of Stella into the main shade card. I’ve knit with bamboo blends a couple of times, and only once have I been happy with the results. So while I haven’t used Stella (there’s your grain of salt to accompany my opinion), I’m yet to be convinced by bamboo blends in general.
Some of the new classic colourways, specifically Midnight Blue, Midnight Mix and Claret Mix, are lovely. Midnight Mix and Claret Mix remind me of some of the marled colourways that worked so well in Rustic. I don’t think they work as well in a crepe yarn, but are still nice enough for me to consider purchasing some. The only drawback to them is the weight; a project I’d use them for calls for a 5ply crepe and these new colourways only come in 8ply. I’m never satisfied, obviously.
So, over to you. What do you think about this year’s shade card?
Posted in Knitting | 6 Comments »
March 9th, 2014
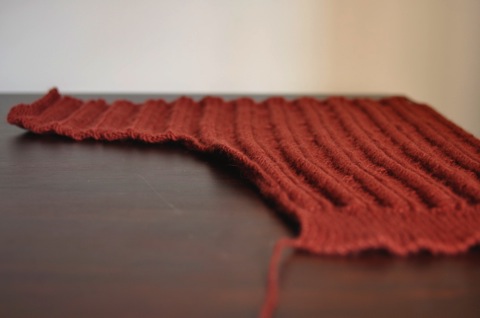
A mere… five weeks after setting the goal to finish the sleeves on my Lee Target cardigan, it’s done! Knitting the back and sleeves as one piece seemed like a walk in the park when I first looked at this pattern, but in reality it was a slog. As a result, my enthusiasm for this project has waned since first starting it. So much so that it’s taken me two weeks since finishing the back to actually write about it.
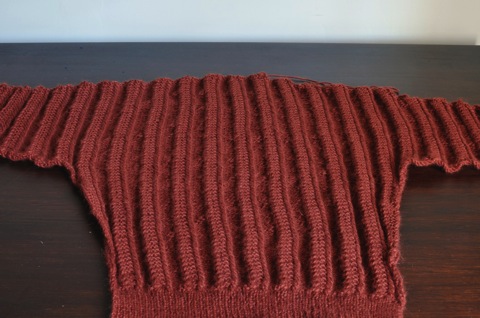
The upside to spending so much time on the back it that I now know the stitch pattern quite well. The long rows were the equivalent of writing “I must not forget ‘*KB, K2, KF, P4′”; hopefully I won’t have to reknit as many rows in the remaining sections of the cardigan. Also, the other sections of the cardigan are much smaller, so no more 200ish stitch rows.
I’m now seeking solace in my other project, the tri-cable cardigan. It seems somewhat backward to consider a cabled 4ply cardigan a holiday in comparison to an 8ply cardigan, but I’ve never claimed to be rational; in fact, I’m really taken aback by how tiring I’ve found working on the Lee Target cardigan to be. Hopefully working on the tri-cable cardigan will provide enough R & R to get back on to it soon. Who knew knitting could be this mentally taxing?
Posted in Cardigan, Knitting, Vintage | 1 Comment »
January 22nd, 2014
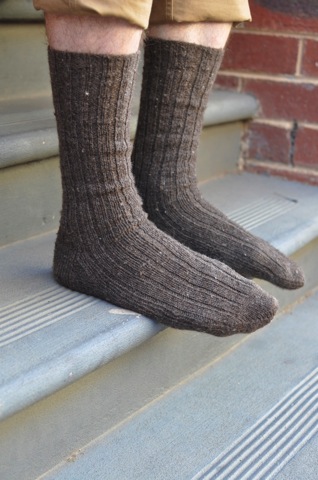
Sox (Dutch Heel) aka Design No. 1799 from Sun-Glo Knitting Book Series 15
110-ish grams Candlebark Country Socks Corriedale/Romney 5ply
2.25mm dpns
Started: July 2013
Finished: November 2013
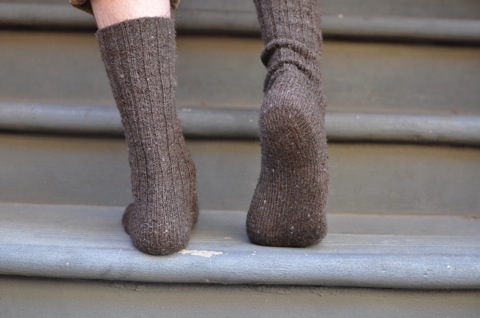
Modifications: picked up more stitches around the heel flap, worked a few more decrease rounds at the foot.
Ravelryed: here
These socks were part of Matt’s Christmas present last year. They were knit on public transport, at Stitches and Bitches and at various other points in time where Matt wouldn’t see them in progress. Evidently I did a good job of hiding them, because he was thoroughly surprised (or so he tells me).
Both the yarn and the pattern came from Bendigo on the Sheep and Wool Show weekend. The yarn was from Corriedale/Romney sheep from a farm just outside of Bendigo, and the pattern from a stack of vintage patterns I picked up from the Sheep and Wool Show. I generally not location-loyal when it comes to buying things, there’s still enough hometown pride left in me to be tickled by the Bendigo-ness of it all.
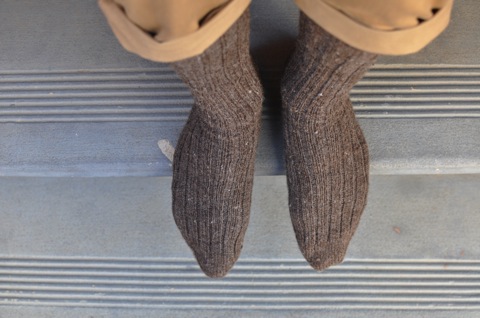
I think these socks are one of the best yarn/pattern combinations I’ve ever come across. The socks are pretty basic ribbed socks, but the rustic, slightly slubby texture of the yarn lends itself well to a fairly plain ribbed sock.
The yarn was quite good to work with. It still had a slightly greasy texture from the lanolin left in it, and there was a little bit of vegetable matter that was fairly easy to pick out as I went along. It turns out I quite like working with that kind of toothy, unrefined yarn; it’s not something I’d really want against my neck, but even without nylon in it it seems tough enough to handle the wear and tear of being sandwiched between a foot and a boot.
One thing about the yarn I didn’t care for was the smell when I was blocking the yarn. Because of the lanolin content I was expecting a wet sheep smell, but as soon as it hit the water, it gave off a pungent camphor/petroleum smell. It was so strong that even though I was blocking it in a room with the door closed and the window open, the smell was still wafting into other parts of the house. Once the socks were dry the smell disappeared, but I’m not particularly looking forward to their next wash.
The pattern itself is fairly unremarkable, it’s just a fairly long (4.5 inch cuff, 12 inch leg) sock with a dutch heel (which, incidentally, seems to be Matt’s preferred heel type. Just so you know). The pattern book was published in 1940, so it’s unsurprisingly quite utilitarian in its design. The only modification I made was to pick up more stitches along the heel flap and increased the number of decrease rows to account for those extra stitches.
All pretty straightforward, but a lovely result nonetheless.
Posted in Finished objects, Knitting, Socks, Vintage | 3 Comments »