Little paper stockings
December 20th, 2010
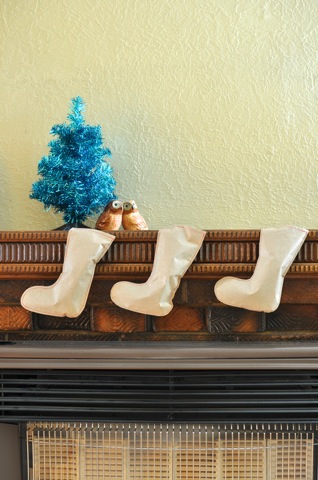
For a good part of yesterday afternoon, Matt and I worked on putting these little beauties together. As many of my non-knitting projects do, this started off as a childhood memory. When I was younger, I really liked receiving those clear plastic stockings filled with popular chocolate bars for Christmas. They’re admittedly cheap, overpriced tat, but there’s no accounting for taste when you’re younger (my love of New Kids on the Block is another example of my dubious taste as a child). From that little seed of a memory, I made my own version of them.

Because they’re pretty quick to put together, and thus could work as a last minute gift, I thought I’d note down how we went about making them.
Ingredients:
Stocking template
Paper
Pencil
Eraser
Sewing thread
Scissors
Wrapped sweets
Method:
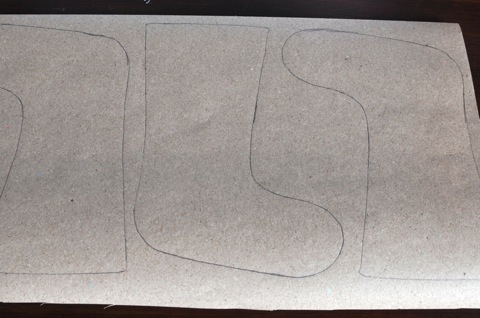
I’m not good at drawing, so I found a stocking template on Google Images to trace around. My stockings ended up being around 18cm long, 8.5cm wide at the top and the foot 12.5cm long. However, rather than be prescriptive about it all, I recommend finding a template that appeals and go with that. Or, if you are that way inclined, draw a stocking shape freehand.

We then traced the stocking shape onto a double layer of paper. We used brown paper from a large stationery chain store and could fit three stockings across the width of the paper. The most important thing about selecting paper to use in this project is to choose something that is strong enough to hold the weight of the sweets and treats you wish to put in them, but not so stiff that it can’t be closed up at the top.
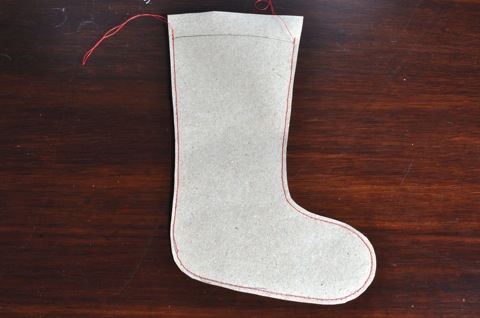
At this point it’s probably best to cut around the stockings, leaving a 0.5-1cm seam allowance, but as my sewing skills are about as good as my drawing skills, I sewed around the stockings first using my sewing machine then cut them out. In some ways this was a good exercise in sewing machine control for me… in fact, it’s possibly something I should have done before launching into sewing garments. Oh well, you live, you learn.

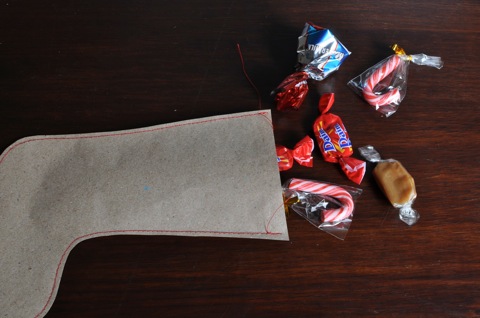
Then we erased any visible pencil marks, and filled with a delightful assortment of wrapped lollies. I found it a bit difficult to get lollies into the toe of the stocking. This slight issue could easily be alleviated by making a bigger stocking, or using a template where the foot is not at a right angle to the leg.

Once the stocking is filled with treats, sew up the top, trim any excess thread and any excess paper at the top, and you’re done!
‘Tis a really simple project; in fact, I’m wondering whether I really needed to write out directions. Unnecessary though they may be, they do provide a good segue way into wishing you all a very relaxing and enjoyable holiday period. Stay safe if you’re driving anywhere, and beware of snow drifts (this goes for people in the northern or southern hemisphere!).
December 22nd, 2010 at 8:02 am
What a great idea! I used to love those plastic stockings full of tin foil santa chocolates too.
And thanks for your comment! Yes, they are Saltwaters and I went ahead and ordered them! YAY!
December 22nd, 2010 at 5:02 pm
i loved those plastic stockings too. Who wouldn’t have? I think these are a really nifty idea – and I appreciated the tutorial. Excellent work!
December 22nd, 2010 at 6:24 pm
Merry Christmas 😀
December 23rd, 2010 at 3:16 pm
oh i remember those, i loved them too, they always lasted forever. what a great idea!
December 24th, 2010 at 1:08 pm
Love the idea! I have all the materials to whip up a few just in time ; )
December 30th, 2010 at 7:40 pm
Love the idea and have contemplated making some but ran out of time! Will keep them in mind for next year 🙂