Sunshiny garden furniture – a DIY tale
July 12th, 2010
Eleven months ago, we brought home an outdoor table and chair that was in need of a bit of love and attention. I posted a photo of them previously, but here’s a reminder:
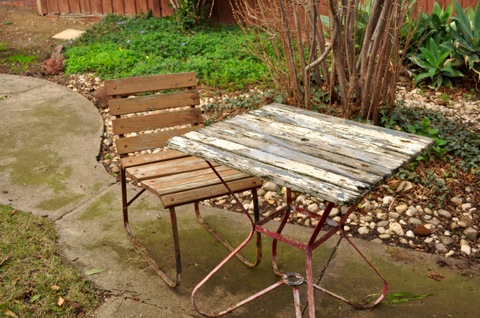
With a few repairs courtesy of my Dad and some sandblasting, powder coating, new wood, bolts, paint and a generous dollop of procrastination, the poor old table and chair was new again.
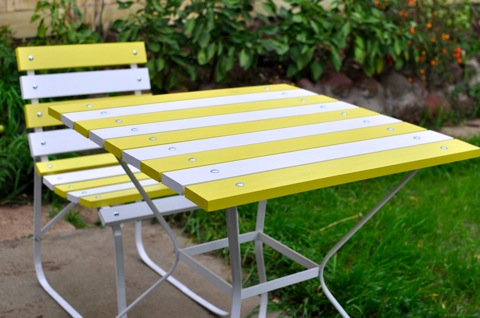
I am so so pleased with how they turned out. Initially I had doubts about the yellow we chose, but once assembled, it goes well with the white. The colours we used were Taubmans Yellow Spark and Dulux White on White, both in semi-gloss.
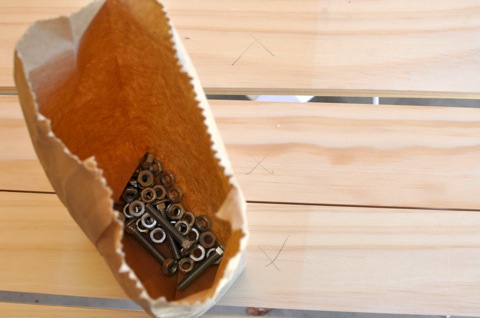
Strangely, the most difficult thing to procure were the bolts. A major Australian hardware chain that is the place to go to for these kind of items only had bolts with the manufacturer’s logo on the dome. This simply would not do, so an extensive search commenced. Finally we found some logo-less bolts at an independent hardware store. They came in a brown paper bag, which made me happier than it probably should.
As there’s only one chair and two of us, another one (or two or three) chairs are needed to complete the set. On the upside, there’s more than enough paint left over — the smallest amount of paint we could buy was one litre, which was more than enough, even with multiple coats.
I could really get used to this furniture restoration caper. It seemed to take a lot longer than it should to finish, but I’m so proud of the end result. The perfect christening would be do sit outside in the sunshine with some tea and scones with jam and cream. I might just have to wait a little while longer for that to happen.
July 12th, 2010 at 9:20 pm
Wonderful transformation Emma. Congrats to Dad and you on your efforts. Didn’t you get that sun today?? Or was it the scones that were missing 🙂
July 12th, 2010 at 9:35 pm
That’s inspiring! And so sunny, perfect pick me up for this dreary season.
July 12th, 2010 at 9:45 pm
oh my goodness it looks fantastic! What a lovely job. It’s brand new again!
July 12th, 2010 at 10:07 pm
Straight to Design*Sponge with this!! Go on, it looks great! Details for submission are in this post if you’re interested: http://www.designspongeonline.com/2010/07/before-after-heathers-chairs.html
July 12th, 2010 at 10:52 pm
What an incredible transformation! Perfect choice of colours and the bolts look brilliant – well worth seeking out.
(Oh, and I love brown paper bags too. I dream of one day living in a place where groceries come in brown paper bags – I’d love to carry them home thusly, only once though because it’s not very environmentally friendly, but I promise I’d recycle!)
July 13th, 2010 at 8:28 pm
The table looks so pretty Emma! 🙂
July 18th, 2010 at 3:19 pm
It is an amazing transformation and I love the sunny colour scheme. I hope you find some more chairs for your set. I can imagine even a non-matching style of chair, if you painted it with the same colours, could look great.
July 23rd, 2010 at 6:56 am
love the way they came out, and to share a Design Sponge before & after spot with you!
-Holly
July 23rd, 2010 at 5:34 pm
Hey you……..YOUR ON DESIGNSPONGE you clever thing!!!
July 28th, 2010 at 2:58 am
Hey there! I saw your great table on Design Sponge and would like to know if I can feature it on my blog as well? C’mon over and check it out and let me know what you think! http://betterafter.blogspot.com
August 4th, 2010 at 3:18 pm
Great job. The two sets don’t even look like they are the same.
August 6th, 2010 at 2:17 am
This is so pretty! Great job!
August 12th, 2010 at 12:42 am
Visiting from Better After – that is really SUPER cute!!
August 20th, 2010 at 12:58 am
Looks fantastic! I’ve always wanted to try something like that myself, and your success has made me want to even more 🙂